Focused Inbox is a feature in Outlook that automatically sorts your emails so that you can “focus” on what’s important. These pre-sorted emails will appear in either the “Focused” or “Other” tab above your list of emails.
Emails that Outlook deems important will appear in the “Focused” inbox, while the rest of them will appear in the “Other” inbox. Usually, these include marketing emails, automated system messages, and bulk emails.
Outlook is normally pretty good about sorting emails appropriately, but if Focused Inbox is giving you heartburn then you can simply turn it off. In this article, we’ll show you how on your PC, Android, or iPhone.
How to Turn off Focused Inbox in the Outlook 365 Desktop Client
To turn off Focused Inbox in the Outlook desktop client, simply toggle the option off under the View tab in the Ribbon bar at the top of Outlook:
- Open the Outlook desktop client and sign into your account.
- Click the
Viewtab in the Ribbon bar at the top of Outlook and then clickShow Focused Inboxto toggle the option off.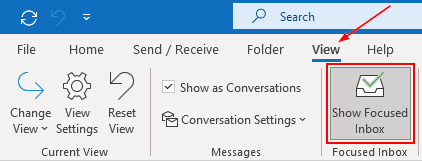
How to Turn off Focused Inbox in Outlook for the Web (OWA)
In Outlook for the Web, you can turn off Focused Inbox under the Layout section of Outlook settings – here’s how, step-by-step:
- Open Outlook for the Web and sign into your account.
- Click the
Gearicon at the top right of Outlook and then clickView all Outlook settingsat the bottom of the menu that appears.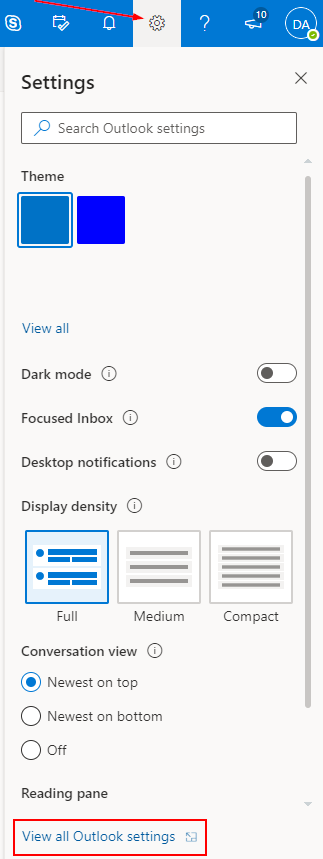
- In the Settings Window, and with Mail and Layout selected in the left-most menus, click
Don't sort my messagesunder Focused Inbox.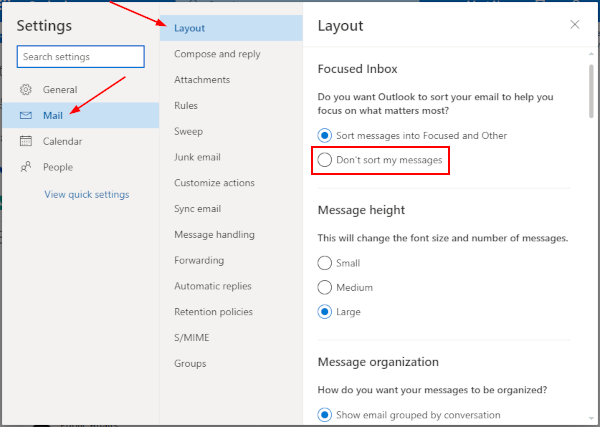
Turning off Focused Inbox in the Outlook Mobile App
You can turn off Focused Inbox in the Outlook mobile app on your Android or iPhone by toggling the option off in Outlook settings – here’s how, step-by-step:
- Open the Outlook mobile app and sign into your account.
- Tap the
Office 365icon in the upper right corner and then tap theGearicon at the bottom left of the menu that appears.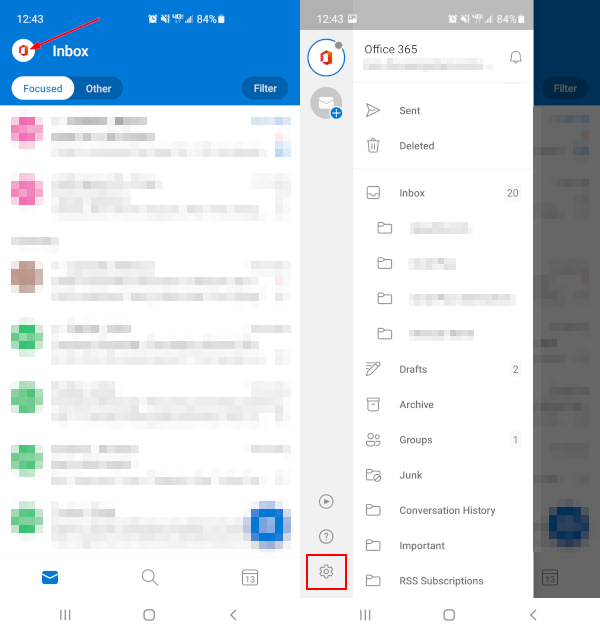
- In Settings, scroll down to the Mail section and tap
Focused Inboxto toggle the feature off.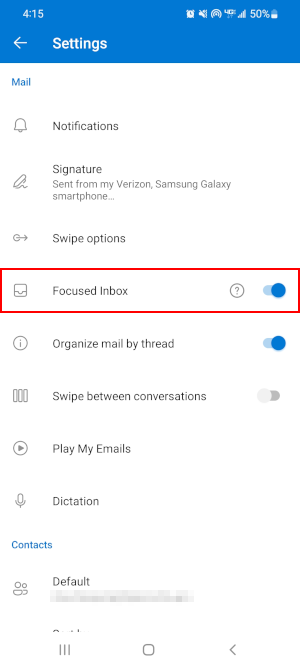
Reclassifying Emails as Focused or Other
As an alternative to disabling Focused Inbox entirely, you can reclassify emails so that they appear in the “Focused” or “Other” inboxes. You can choose to do this for one email or all future emails from the same sender.
If you need to reclassify a bunch of emails, you can select multiple emails and move them all at once.
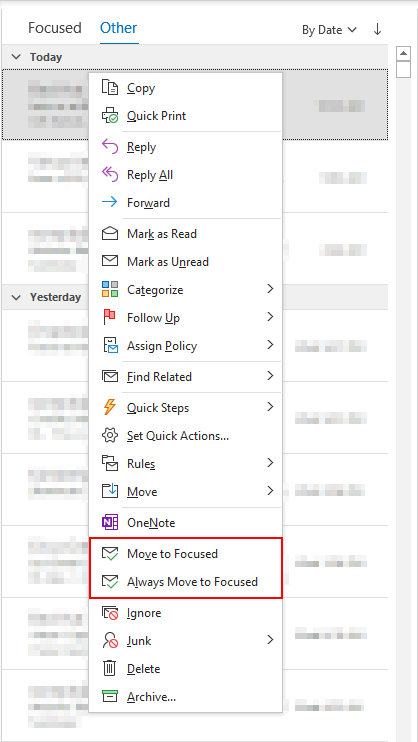
To do this in the Outlook 365 desktop, simply right click any email and select Move to Focused/Other or Always Move to Focused/Other.
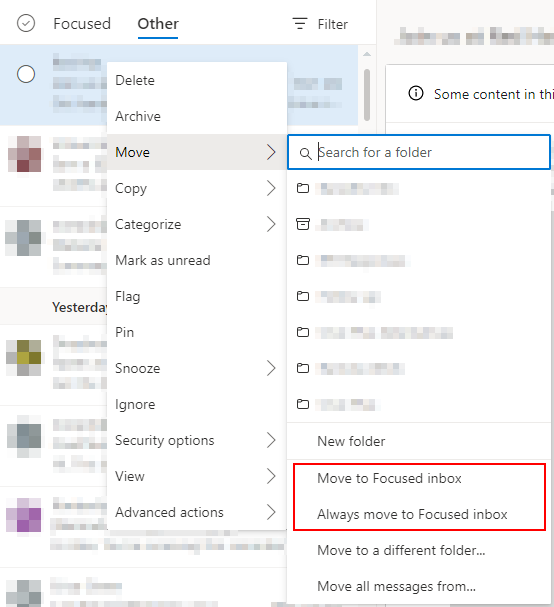
In Outlook for the web, right click any email, hover over Move, and select Move to Focused/Other inbox or Always move to Focused/Other Inbox.
In the Outlook mobile app:
- Tap and hold on any email until a checkmark appears to the left of it.
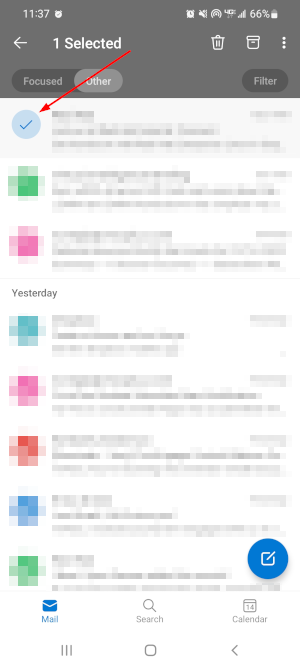
- Tap the
3 dotsin the upper right corner and selectMove to Focused/Other.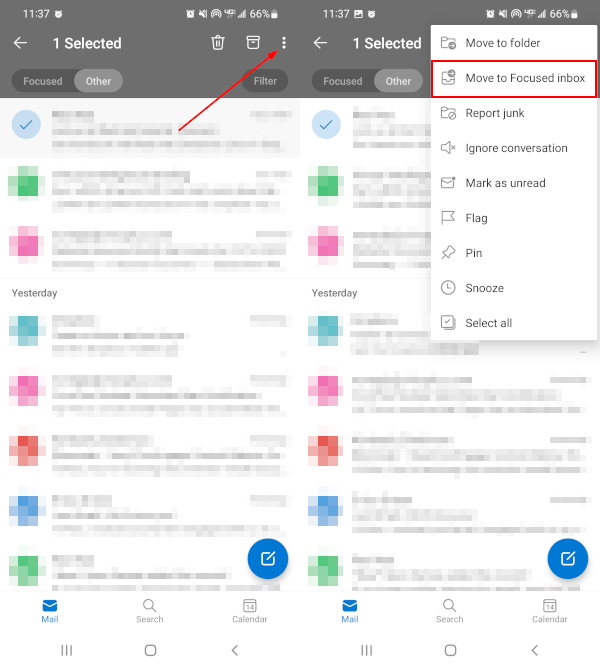
- Choose whether you want to move only this email or all emails from this sender and then tap
Move to Folder.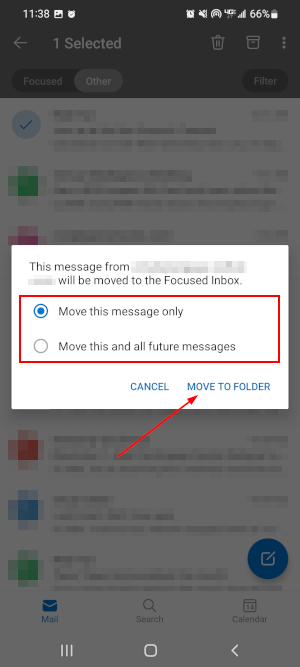
Final Thoughts
Focused Inbox in a neat feature but it may not be for everyone. Thankfully, turning it off is easy and you can do so at any time you please.
If you ever want to try Focused Inbox again, simply repeat the same steps above to turn it back on.
Now that your “Focused” and “Other” inboxes are merged, you should check out how to filter your inbox so finding things in it will be easier.


