Microsoft has recently started rolling out a new AI-driven noise suppression feature to its collaboration platform, Microsoft Teams. This noise suppression feature uses deep neural networks and machine learning to distinguish noise from clean speech and filter out the former. While currently only available on the desktop client, it comes as a blessing for many of us working from home during the COVID-19 pandemic.
How to Enable & Disable Noise Suppression in Microsoft Teams
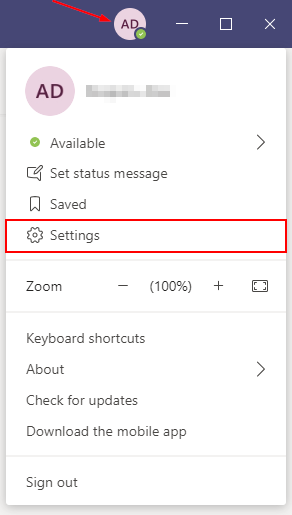
In Microsoft Teams, click your profile picture at the upper right corner and select Settings.
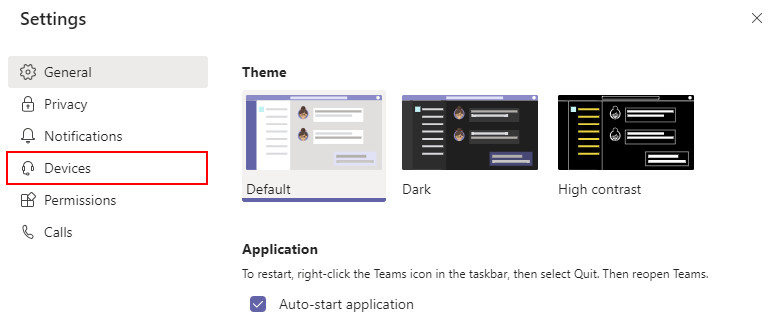
Click Devices in the menu at the left.
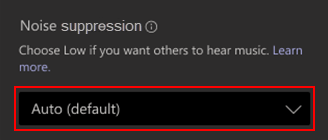
Under Noise suppression, use the drop down menu to select the level of suppression you need.

- Auto – Suppression level is automatically determined by Teams (default setting).
- High – Teams will suppress all background noise that isn’t speech. This option is more computer resource heavy and is not available in meetings or calls being recorded or with live captions enabled. Your computer’s processor must also support Advanced Vector Extensions 2 (AVX2).
- Low – Suppresses lower levels of persistent background noise such as fans, air conditioners, vacuums etc.
- Off – Disables noise suppression.
Adjusting Noise Suppression During a Meeting
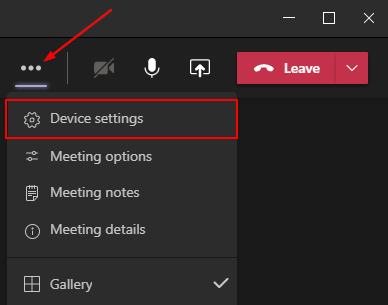
While in a meeting, click the 3 dots in meeting controls and select Device settings.
Under Noise suppression, use the drop down menu to adjust the noise suppression level.


It is interesting to read your blog