It might not seem like it at first glance, but headers are an important part of professional writing. Outside of page counts, they’re useful for organization, and for letting any readers know the importance of the page they’re looking at with just a glance.
It might sound silly, but some companies are very specific with internal guidelines. Some might require customized bulleted lists, and others might require specific header formats.
In this article, we’ll be showing you how to show a header on only the first page, as well as set headers for odd and even numbered pages, in Google Docs.
Swift Tip
To show a header on only the first page in Google Docs, first double click inside the header, so it’s selected, then check the “Different first page” checkbox in the grey bar below it. If you don’t already have a header, you can insert one by clicking the “Insert” tab in the toolbar, hovering over “Headers & Footers” and selecting “Header”.
How to Show a Header Only on the First Page in Google Docs
When inserting a header onto the first page, you’ll see a checkbox that reads “Different first page.” Click the box to check it, and from that point forward, the information you place in that header will be different from all subsequent pages.
You can insert a header by opening the Insert tab in the toolbar at the top of Google Docs. Below, we’ll show you how step-by-step:
- Open docs.google.com, sign into your account, and create a new document or edit an existing one.
- Click the
Inserttab and selectHeaders & Footers > Header. Alternatively, you can double click in the header area of the document.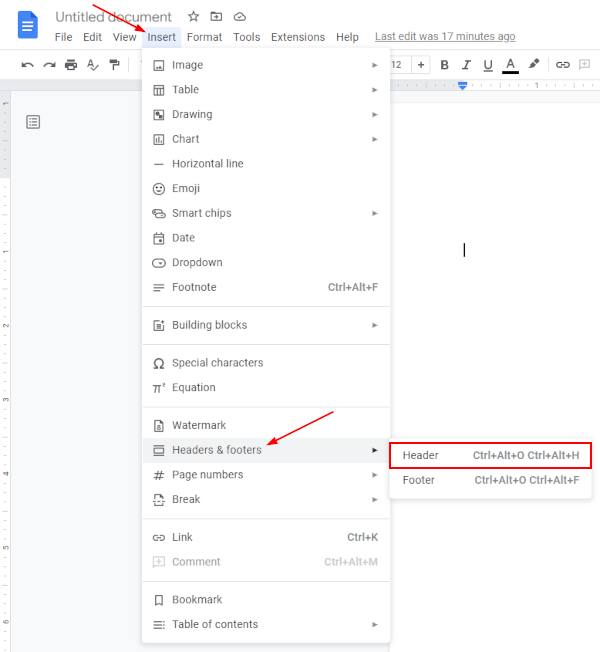
- With the header now visible in the document, click the
Different first pagecheckbox at the bottom right of it.
- The information you add to this header will now be different from all subsequent pages.
How to Show a Different Header for Odd and Even Pages
The process for setting headers for even or odd pages is a bit different. Unlike with the first page header, there’s no immediately available checkbox. Instead, once you’ve created a header, open the Options dropdown menu at the bottom right of it and change the header format from there.
You can have different headers for even and odd pages, and just like before, you can create headers by opening the Insert tab in the toolbar at the top of Google Docs. Here’s how, step-by-step:
- Open docs.google.com, sign into your account, and create a new document or edit an existing one.
- Click the
Inserttab and selectHeaders & Footers > Header. Alternatively, you can double click in the header area of the document. - With the header now visible in the document, click the
Optionsdropdown at the bottom and selectHeader format.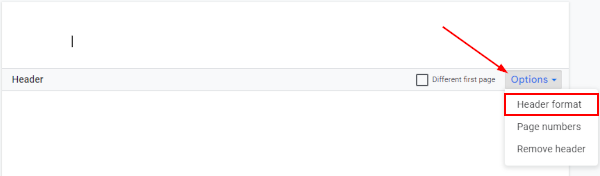
- In the window that appears, click the
Different odd & evencheckbox below Layout.
- Click
Apply.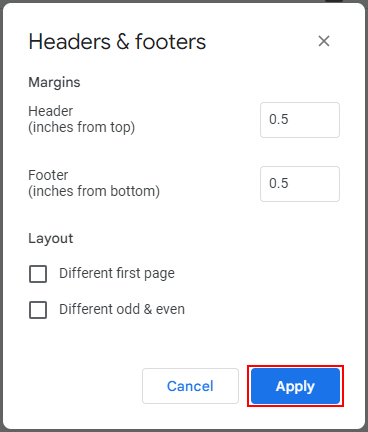
- Headers will now show different information depending on whether they’re shown on a page with an odd or even page number.
Final Thoughts
Alternating headers between even/odd page numbers might seem a bit, well, odd – but it’s more common than you think. Many troubleshooting manuals use a problem and solution format, so it’s important that anyone looking through it knows whether they’re looking at the problem or the solution. If not, they could very well make things worse.
Outside of that, some companies have very specific style guides that must be adhered to. Some require borders around or under text, and others may require some seemingly arbitrary style of visual arrangement.


