While Google Docs is widely known for enabling collaboration on text-based mediums – as well as making documents accessible from almost anywhere in the world – it also makes for a surprisingly robust visual presentation tool.
On top of inserting images, graphs, borders, and many other visual aids, Google Docs allows users to insert shapes. You can then place these shapes wherever you want – including around text.
This is a useful tool for highlighting important information, whether for yourself or a collaborator. In this article, we’ll go over how to insert a circle (and other shapes) and place them around text in Google Docs.
How to Insert a Circle in Google Docs
Before we show you how to circle a word in Google Docs, you need to know how to insert a circle into the document itself. You can do this from the Insert tab on the toolbar. Here’s how, step-by-step:
- Open docs.google.com, sign into your account, and create a new document or edit an existing one.
- Click the
Inserttab and selectDrawing > New.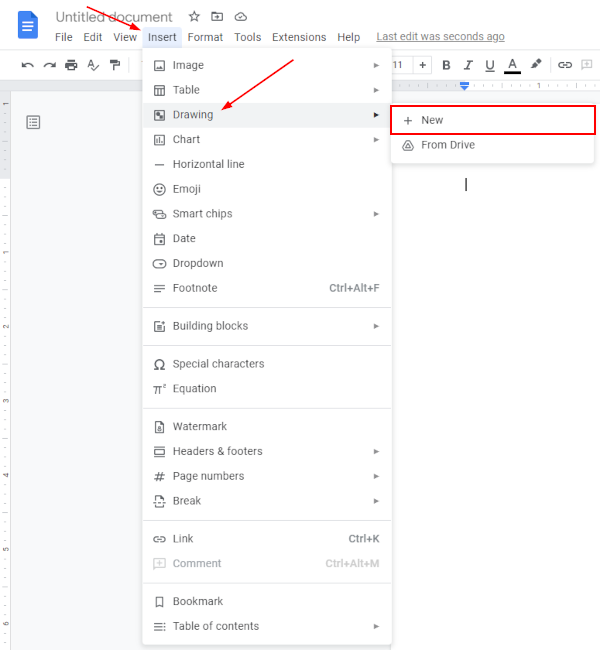
- In the Drawing window that appears, click the
Shapeicon in the toolbar at the top and selectShapes > Oval.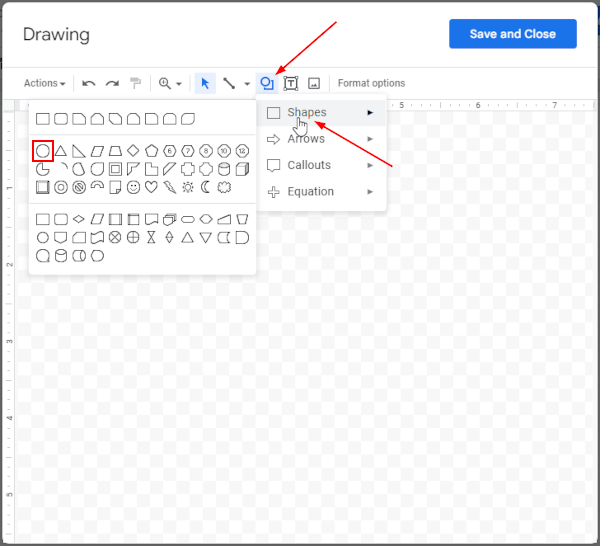
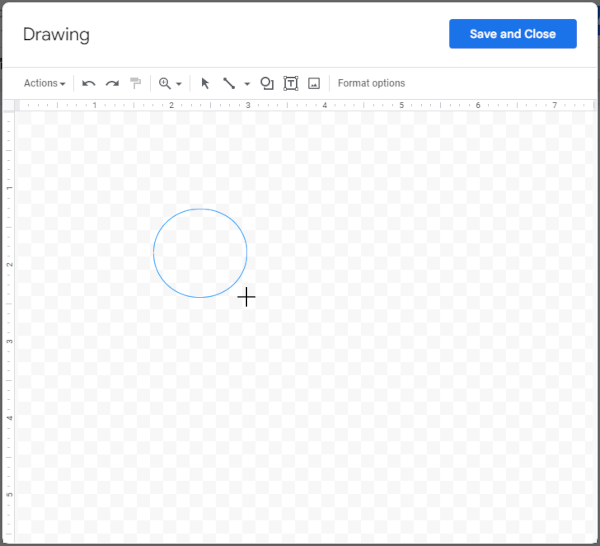
- Draw a circle in the available canvas space. Click and drag until the circle is the desired size, then release. Don’t worry too much about getting this exactly right, you can more precisely resize it later.
- With the shape selected, click the
Fill coloricon in the toolbar at the top and selectTransparent. You need to be able to see through the circle to see the word.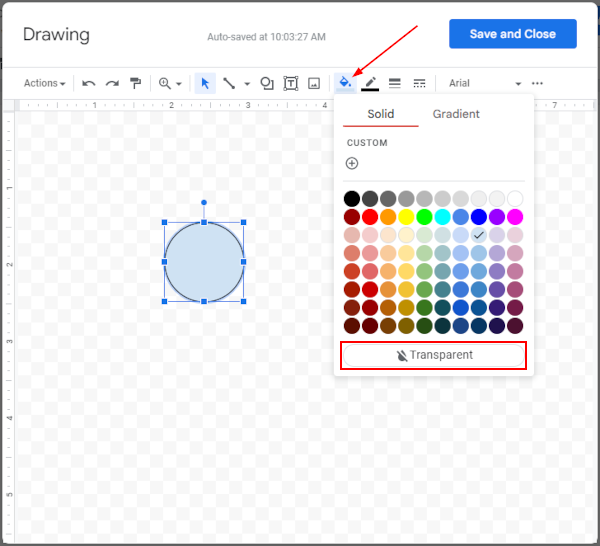
- Optionally, style the shape’s border, or add some color to it, using the
Border dash,Border weight, andBorder coloricons in the toolbar at the top. You might want to make the border red, and increase its weight, if you’re using the circle to draw attention to a specific word.
- Click
Save and Closein the upper right corner of the Drawing window.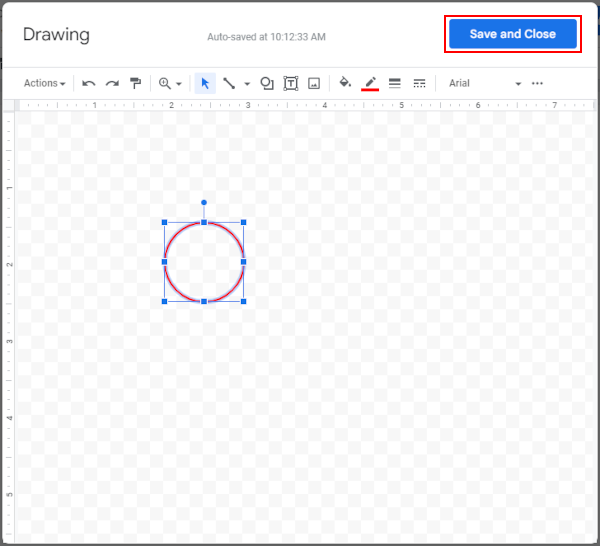
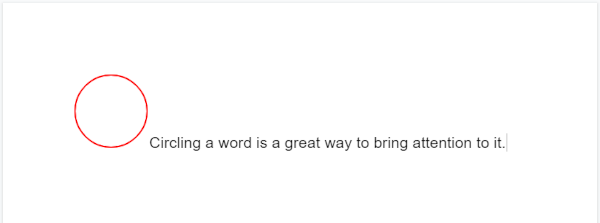
- The circle will now be inserted into the document.
With the circle now placed in the document, you simply need to position it over the word you wish to circle. This is a bit more tricky than you might think, but we’ll show you how in the section below.
It’s also worth noting that you’re not limited to just circles. You can insert a variety of other available shapes, or even draw your own.
How to Position a Circle Over a Word in Google Docs
After inserting a circle into your document, the default text wrapping is “in line”. This means that text will move around the shape. In order to move the circle freely, and place it on top of a word, you need to change its text wrapping to “in front of text”.
Here’s how to change the circle’s text wrapping and position it over a word:
- Within Google Docs, click the circle to select it. A blue border will appear around it with a toolbar below it containing the available text wrapping styles.
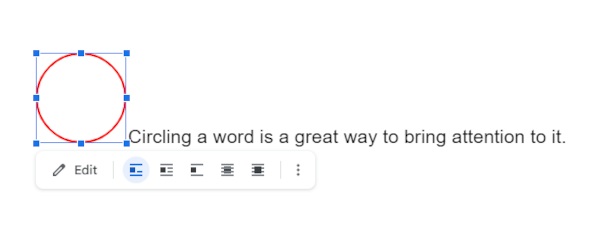
- In this toolbar, select the
In front of texttext wrapping style. It’s the last text wrapping style in the toolbar.
- Drag the circle and place it roughly over the word you wish to circle.
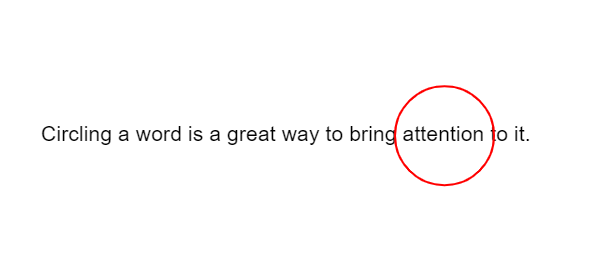
- Resize it by dragging the
Handlesthat appear around the circle when it’s selected.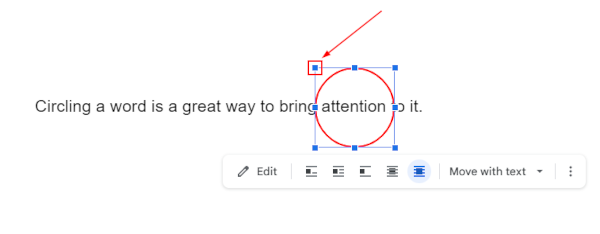
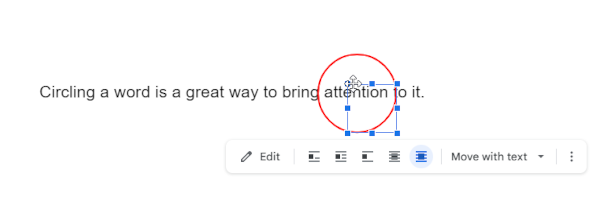
- Reposition the resized circle over your word again. You may need to continuously resize and reposition it to get it just right. You can fine tune the positioning pixel by pixel by holding down the
Shift keyon your keyboard and using theArrow keys.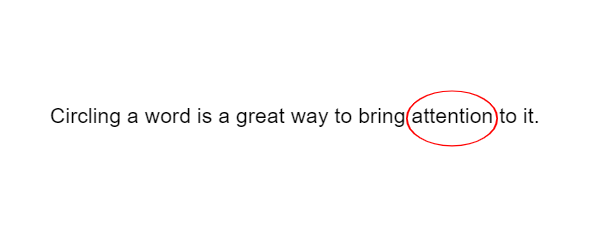
- If you later decide to change the circle’s border color, style, or weight, simply select it and click
Editin the toolbar that appears. This will open the Drawing window, as seen in the section above, where you can make your changes.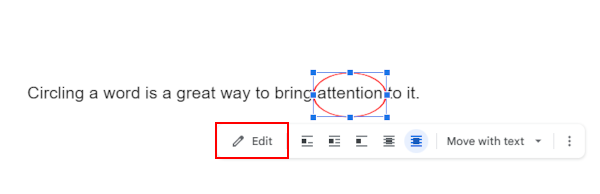
Can you Circle a Word in the Google Docs Mobile App?
No, you can’t. At the time of writing, users are strictly unable to insert images or shapes in this fashion through the Google Docs mobile app, regardless of their OS/manufacturer. Android can’t do it, and neither can iPads/iPhones.
If you want to use this functionality of Google Docs, you have to use a PC – there’s no way around it.
Conclusion
Google Docs remains a useful tool for collaboration; and not just for text-based projects. Circling words is a great way of grabbing your audience’s attention, or for highlighting something that needs to be changed by a collaborator.
You can also insert a lot more than just circles or other shapes. You can create colored borders, make your own graphs, and so on.


