While Google Docs is primarily meant to enable collaboration between writers, it also allows users to manipulate images in multiple ways. From flipping images to making them transparent, Docs offers a number of image-based features that you might not expect from an application focused on text-based mediums.
Furthermore, when working with both text and images, it’s possible to control how text behaves around said images – this is called text wrapping.
In this article, we’ll explain the different types of text wrapping available in Google Docs, and walk you through how to wrap text around an image in it on your PC, Android, or iPhone.
What is Text Wrapping?
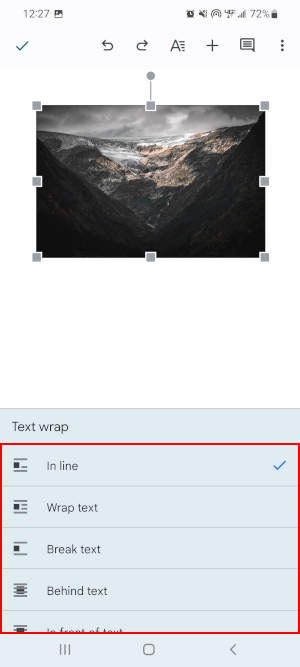
Text wrapping refers to how text behaves when placed around an image. At the time of writing, Google Docs offers five different types of text wrapping: in line, wrap text, break text, behind text, and in front of text. We’ve explained (and demonstrated) each type below.
In line text wrapping is the default option that Google Docs uses when you insert an image. When you choose to wrap text in this style, Google Docs treats the image as a single, large letter. This means that you can place text on the same line as the image, but only on that line.
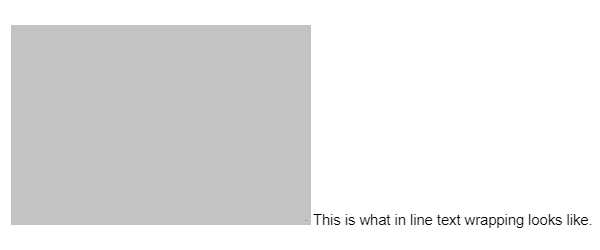
As a result, Docs places the text on the left (or right) of the image, but leaves a lot of blank space.
Wrap text, on the other hand, creates a square border around your image, allowing you to place text on every line that would otherwise be unavailable with in line wrapping.
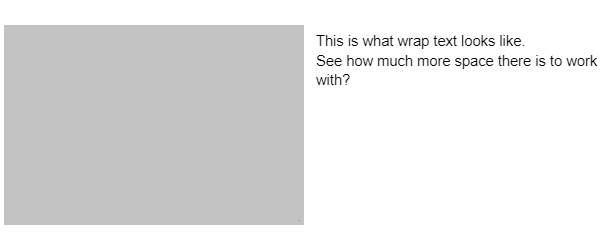
And just like with in line text wrapping, you can choose whether you want the text to the left or the right of the image.
Break text wrapping is different from both the in line and wrap text styles. Instead of making a border around the image itself, Google Docs sections off every line that the image takes up, meaning that you can’t place text there.
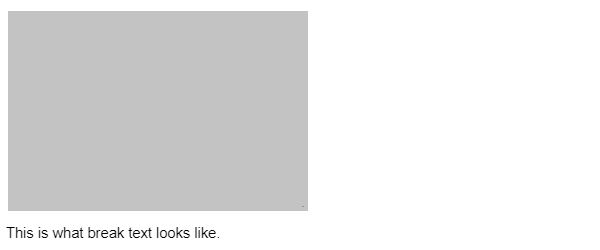
This also leaves a blank line on both the top and bottom of the image.
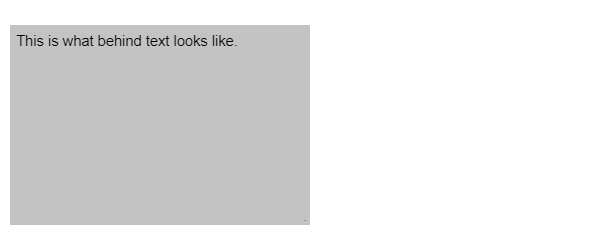
Behind text wrapping places the image behind the text. You can use this style to create background images for your text.
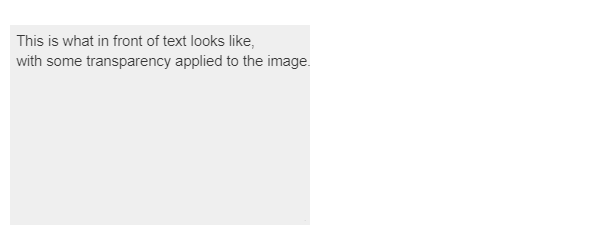
In front of text wrapping does the exact opposite, instead placing the image in front of the text. This style of text wrapping is often used to freely move images and shapes around within the document, but it can block some of the text from your view.

The text is hidden behind the image, but you can add some transparency to the image to see it.
Now that you know what text wrapping is, let’s dive into how you use it to wrap text around images in Google Docs.
How to Wrap Text Around an Image in Google Docs on PC
Wrapping text around an image in Google Docs on PC is as simple as clicking an uploaded image and choosing your desired text wrapping style. Use these steps to do so on PC:
- Open docs.google.com, sign into your account, and create a new document or edit an existing one.
- Place your text cursor where you want the image to go.
- If you’ve copied an image to your clipboard, simply paste it into the document. Either right click and select the
Pasteoption, or use the keyboard shortcut (Ctrl + Vby default). Alternatively, click theInserttab on the top-line menu. From here, hover overImage, and select eitherUpload from ComputerorSearch the Web. Browse for and upload your image.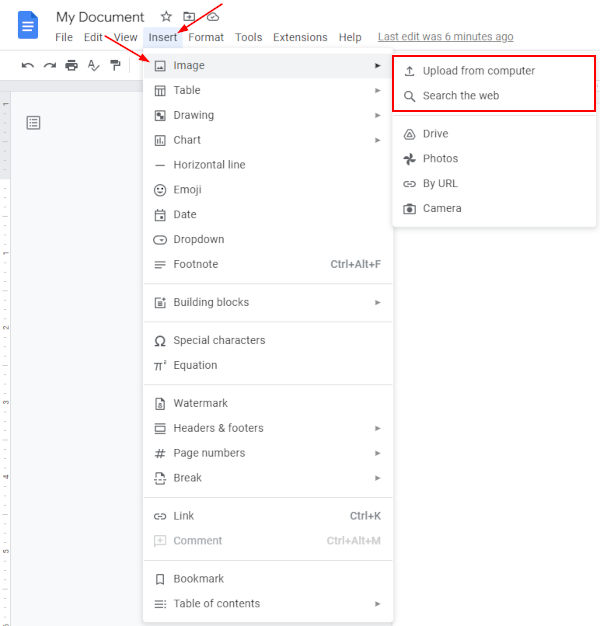
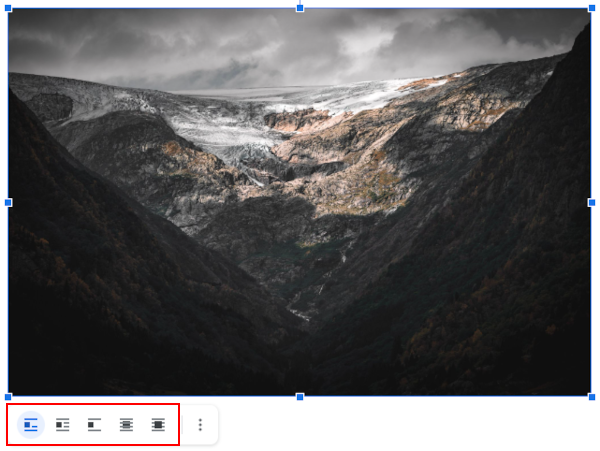
- Once inserted, click the image to select it. A blue border will appear around the image with a toolbar below it containing the available text wrapping styles.
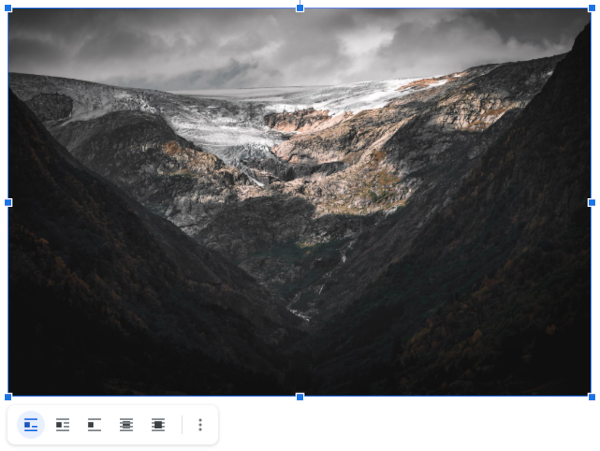
- From within this toolbar, select the text wrapping style of your choice.
How to Wrap Text Around an Image in the Google Docs Mobile App
How you wrap text around an image in the Google Docs mobile app is pretty similar to how it’s done on PC, but the layout is a bit different. Follow the steps below to find out how on your Android or iPhone:
- Open the Google Docs mobile app, sign into your account, and create a new document or edit an existing one.
- Place your text cursor where you want the image to go.
- Tap the
Addsymbol in the upper right corner and selectImage>From Photos. Alternatively, you can selectFrom Cameraand take a photo instead.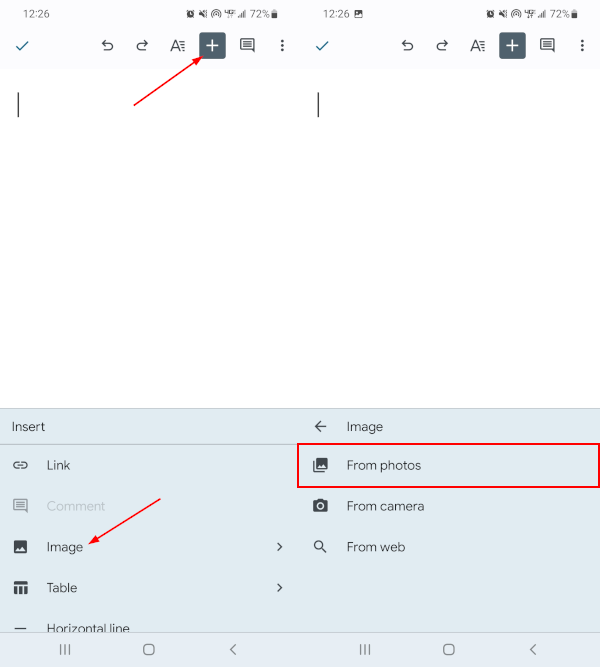
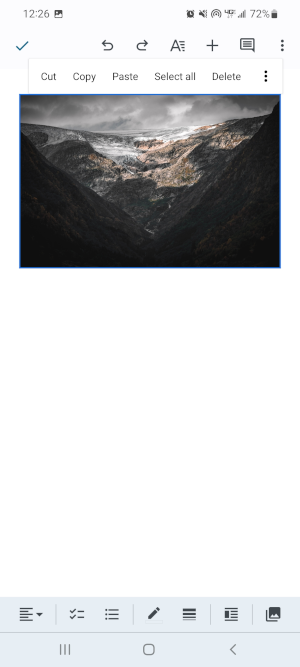
- Once added, tap the image to select it. A blue border will appear around the image when selected.
- With the image selected, tap the
Text Wrapicon in the toolbar at the bottom.
- Select the text wrapping style of your choice in the menu that appears.
Keep in mind that, at the time of writing, you can’t change an image’s transparency in the Google Docs mobile app. This essentially makes using the in front of text wrapping useless without a PC.
Conclusion
While Google Docs remains a word processing application, images (and by extension, visual presentation) remain an important part of capturing the audience’s attention, regardless of the type of text you’re creating.
As such, it’s a good idea to familiarize yourself with the ways that both text and images can interact with one another.
This isn’t limited to just images, either. Just like you can make shapes transparent in both Google Slides and Google Docs, you can change the way that text behaves around shapes as well.


