The ability to record meetings is a super useful feature of Microsoft Teams. Having something you can go back and reference, or a way for those that missed the meeting to still watch, is a good idea. Before you go clicking that record button make sure you know how and where these recording are stored. Check out today’s article on how to record and find previous recordings in Microsoft Teams.
How to Record in Microsoft Teams
Step 1: While in a meeting, hover your mouse over the Teams window so that the call options appear
Step 2: Click the ellipsis icon (3 dots) and then select Start recording
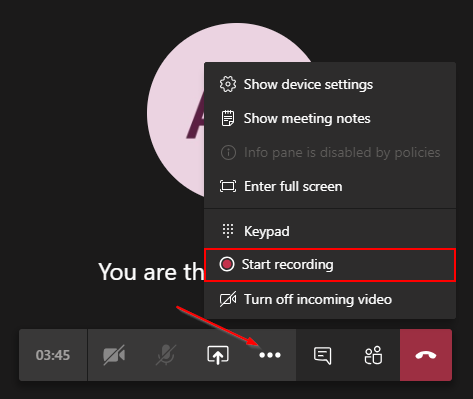
Keep in mind that all participants will get a notification that someone has started recording. You will also see a banner asking you to inform participants that you’ve started recording.
If you don’t see the record option, or it’s grayed out, then your administrator may have disabled the option.
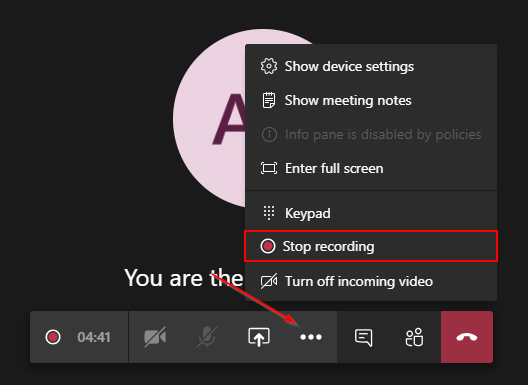
Step 3: When finished recording, click the ellipsis icon again and select Stop recording
Where Are Recordings Stored in Microsoft Teams?
After you stop recording, the file is saved to Microsoft Stream. You will receive an email with a link to the recording. The recording will also be available in the Teams meeting chat.
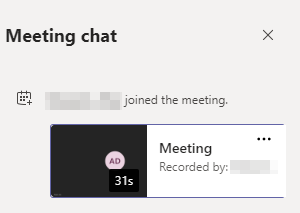
To access the recording during the meeting:
Hover over the Teams window so the call options appear and click the Chat icon

Your recording will appear here after it has finished processing
To access the recording after the meeting has ended:
Click the Chat icon at the left hand side of Teams and select the meeting where the it was taken
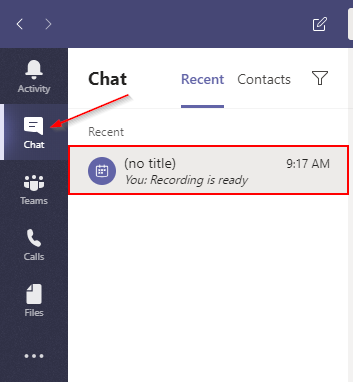
The recording will be listed in the chat history for the meeting.
You can also find all of your Teams recordings at Microsoft Stream. Sign in with your Microsoft account here to view all of your previous recordings.


I have seen a lot of web pages and guides this year for MS TEAMS.
Your pages are amazing.
Thank you.