Spam filters are great for blocking suspicious emails but sometimes they can be a little too sensitive. Gmail’s spam filter isn’t exempt from this problem and you might find emails you actually need in the spam folder. Here’s how to disable the Gmail spam filter and stop it from marking important emails as spam.
How to Disable the Gmail Spam Filter
Following these steps will completely disable the automatic spam filter in Gmail. Use these steps if your constantly finding emails in the spam folder that shouldn’t be there. If only one or more senders are being sent to spam, skip to the section on whitelisting below.
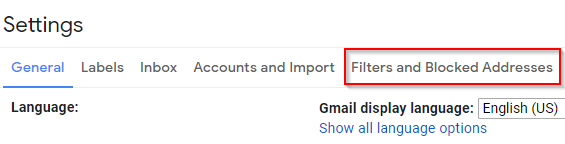
Step 1: Click the gear icon at the upper right hand corner of your Gmail inbox
Step 2: Select Settings
Step 3: Click the Filters and Blocked Addresses tab
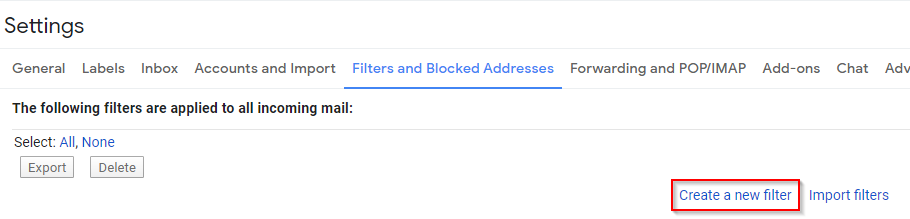
Step 4: Click Create a new filter
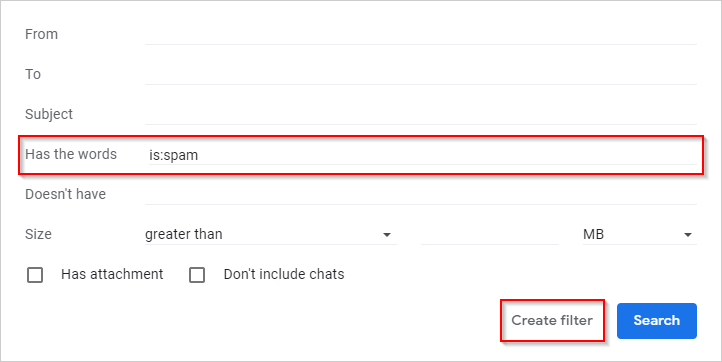
Step 5: Type is:spam in the Has the words field and then click Create filter at the lower right
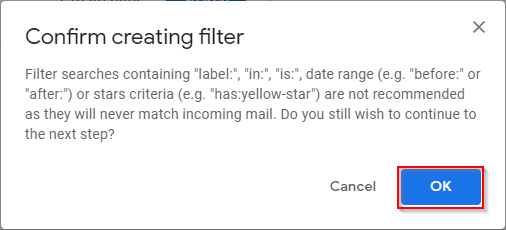
Step 6: Confirm filter creation by clicking the OK button
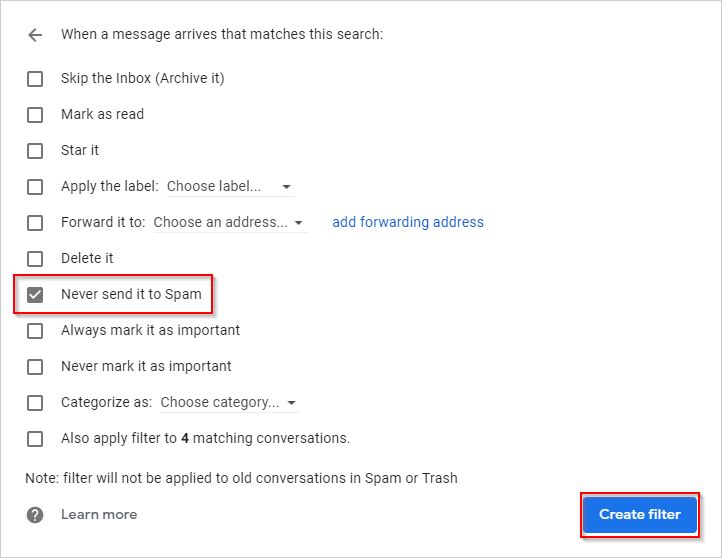
Step 7: Check the Never send it to Spam checkbox and click the Create filter button
How to Whitelist Specific Senders
This method is perfect for people who only have problems with specific senders. Senders you add to this filter will never have their emails sent to spam. You can even whitelist their entire domain so others at the same address (after the @) won’t be sent to spam.
Step 1: Click the gear icon at the upper right hand corner of your Gmail inbox
Step 2: Select Settings
Step 3: Click the Filters and Blocked Addresses tab
Step 4: Click Create a new filter
Step 5: Type the sender’s email address into the From field and then click Create filter at the lower right
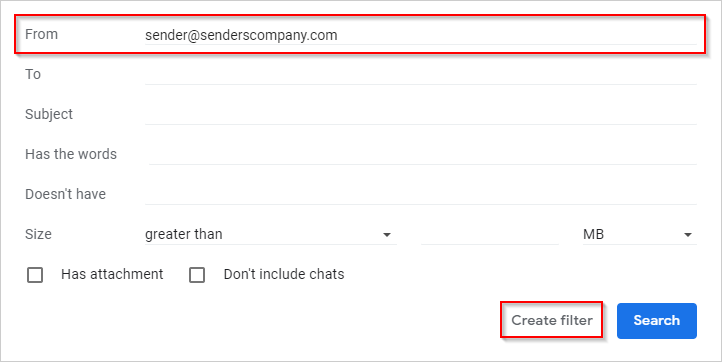
If others at the same domain have similar problems just type what comes after the @ in their email addresses in the From field. For example, whoever@company.com and whoever2@company.com can both be whitelisted by simply adding company.com in the From filter.
Step 6: Check the Never send it to Spam checkbox and click the Create filter button
Final Thoughts
That’s all there is to disabling the Gmail spam filter. The filter should automatically apply its rules and not send important emails to the spam folder.
Gmail has some pretty useful filters, one of our favorites is the ability to filter by date. Try experimenting with some of the other options in the create a filter menu to make your inbox work for you.


")

