Google Docs makes it easy to write essays, newsletters, or articles on nearly any device with a web browser. It’s also full of formatting options that make it possible create complex documents with lists, headers, tables, and more.
When working with lists, especially ones that use custom icons, you might occasionally need to adjust the position of your bullet points. Thankfully, Google Docs makes this easy, you just need to know where to look.
In this article, we’ll show you two different ways you can move bullet points in Google Docs.
Swift Tip
The easiest way to move bullet points in Google Docs is by using the ruler. First, enable the ruler by clicking “View” in the toolbar and selecting “Show ruler”. With the ruler now visible, click the bullet points, so that they’re highlighted, then drag the “Triangle” (Left indent) to the left or right. If you only want to move the bullet points themselves, and not the text, drag the “Rectangle” instead.
How to Move Bullet Points in Google Docs
The easiest way to move bullet points in Google Docs is to adjust their indentation using the ruler at the top of Google Docs. You need to make sure the ruler is turned on for this to be available though.
Here’s how to enable the ruler and use it to adjust the position of your bullet points in Google Docs:
- Open docs.google.com, sign into your account, and create a new document or edit an existing one.
- Click the
Viewtab in the upper left corner and ensure thatShow ruleris checked. You should see a ruler at the top of your document if it’s enabled.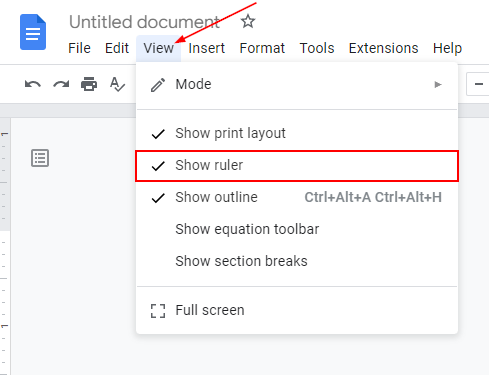
- Click the bullet points you wish to move, so they become highlighted. If you don’t have one already, create one by clicking the
Bulleted Listicon in the toolbar at the top and then click it.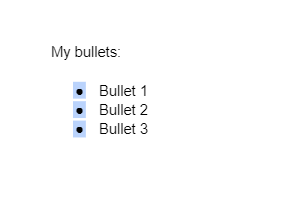
- In the ruler at the top, drag the
Triangle(Left Indent) to the left or right. If you want to move only the bullet icons, drag theRectangle(First line Indent).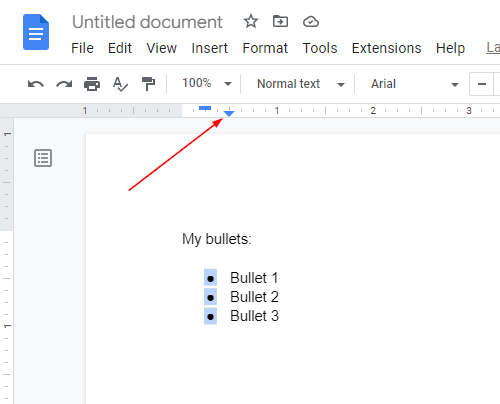
- The bullet points will move respectively.
How to Move a Single Bullet Point in Google Docs
You can also move an individual bullet point within a list of bullet points in Google Docs. The steps are very similar to moving multiple, there’s just one extra step you need to take.
Here’s how to move a single bullet point in Google Docs:
- Open docs.google.com, sign into your account, and create a new document or edit an existing one.
- Click the
Viewtab in the upper left corner and ensure thatShow ruleris checked. You should see a ruler at the top of your document if it’s enabled.
- Click the bullet points you wish to move, so they become highlighted. If you don’t have one already, create one by clicking the
Bulleted Listicon in the toolbar at the top and then click it.
- With all bullet points highlighted, click the individual bullet point you wish to move. It should become the only highlighted bullet point.
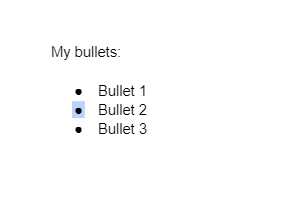
- In the ruler at the top, drag the
Triangle(Left Indent) to the left or right. If you want to move only the bullet icon, drag theRectangle(First line Indent).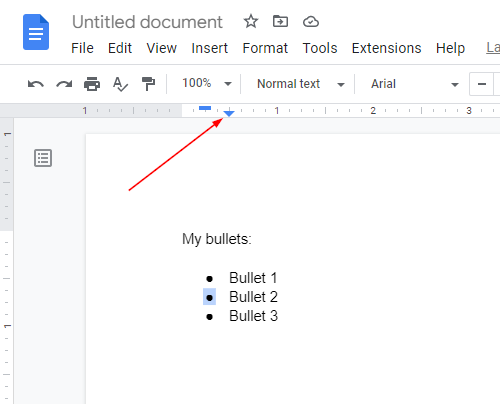
- The single bullet point will move respectively.
Alternative Method: Move Bullet Points in Google Docs Using the Format Tab
Another way you can move bullet points in Google Docs is by using the Indentation options within the Format tab. It’s a great alternative if the ruler isn’t working for some reason.
Follow these steps to move bullet points using the Format tab instead of the ruler:
- Open docs.google.com, sign into your account, and create a new document or edit an existing one.
- Highlight the bullet points you wish to move. If you don’t have one already, create one by clicking the
Bulleted Listicon in the toolbar at the top and then click it.
- Click the
Formattab in the upper left corner and selectAlign & indent>Indentation options.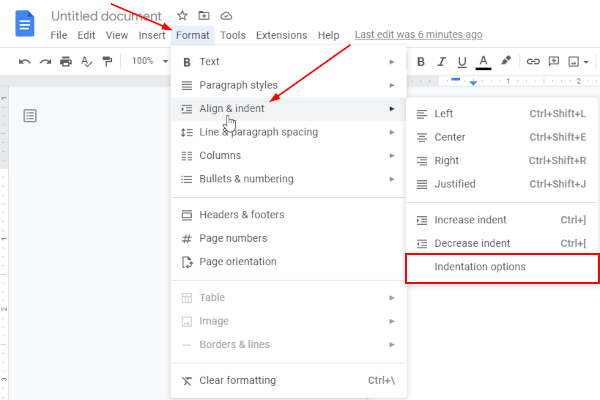
- Increase the number to the right of
Leftto move bullet points to the right, or decrease it to move bullet points to the left.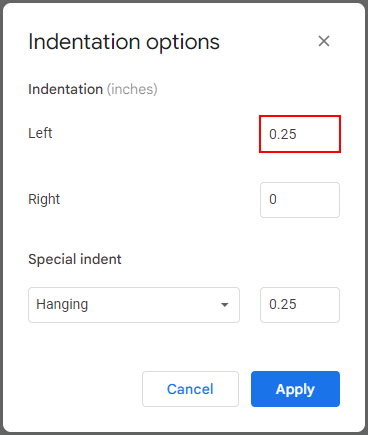
- Click
Apply.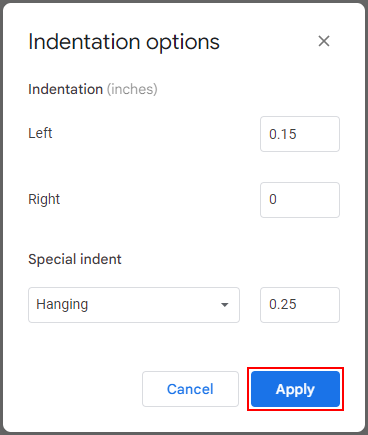
- The bullet points you selected will move to the left or right respectively.
Conclusion
As you can see, moving bullet points in Google Docs simply comes down to adjusting your indentation. Thankfully, doing so is as simple as dragging along the ruler or editing the values in the indentation options window.
