Not too long ago, if you wanted to move a file from one computer to another, you’d have to use a flash drive. While not a big deal, it could prove annoying under more than a few circumstances.
The advent of Google Drive (and the many other cloud storage services that followed) changed that. These days, as long as you have an internet connection, you can access your files from anywhere in the world.
With 15GB of storage given to every user for free, it’s easy to throw everything in there and just forget about it. Do that for too long, though, and you might fill up your drive and end up needing to delete files to free up space.
The easiest way to keep things organized in Google Drive is by using folders, but figuring out how to create them (and move files into them) can be a bit tricky. In this article, we’ll show you how on your PC, Android, or iPhone.
How to Create Folders in Google Drive on PC
Creating new folders in Google Drive is as easy as clicking a button. Follow the steps below to find out how using a web browser on your PC:
- Open drive.google.com and sign into your account.
- Click the
Newbutton on the top left corner of Google Drive, or right click anywhere in the blank space around your existing files. A dropdown menu will appear.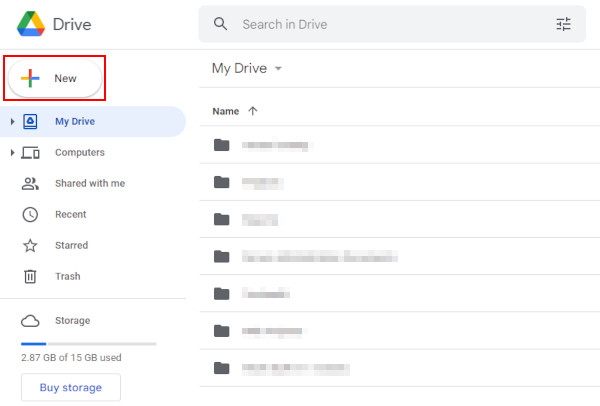
- Select
New Folderfrom the dropdown menu.
- Enter the desired name for your folder and then click
Create, or hitEnteron your keyboard.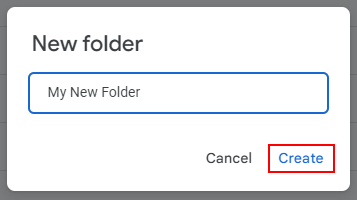
Keep in mind that you can also create folders within folders (within folders). This does make organizing files a bit more difficult, however – more on that later.
How to Create Folders in the Google Drive Mobile App
You can create folders in the Google Drive mobile app in nearly the same way you do it on PC, but the layout is a bit different. Below, we’ll take you through the steps on how on your Android or iPhone:
- Open the Google Drive mobile app and sign into your account.
- Tap the
+button at the bottom right corner of your screen.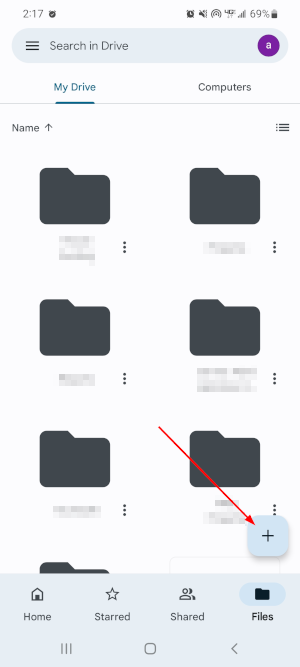
- Select the
Folderoption from the menu that appears.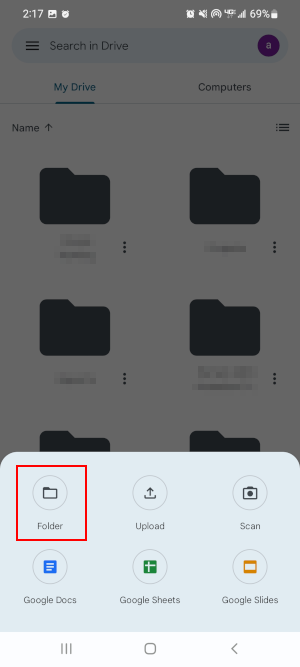
- Enter the desired name for your folder and then tap
Create, or hitEnteron your keyboard.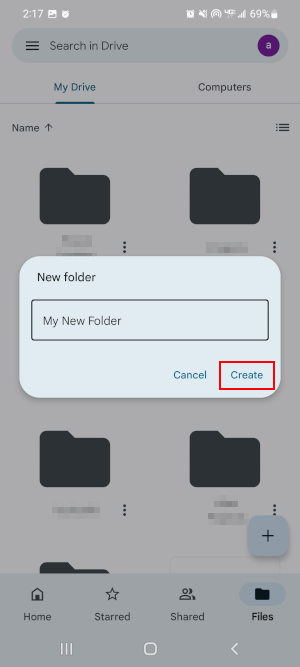
How to Move Files to Folders in Google Drive
Once you’ve created your folders, you can start organizing by moving your files into them. There’s a few different ways you can go about this, and of course, the desktop and mobile clients use different methods altogether.
Desktop/PC
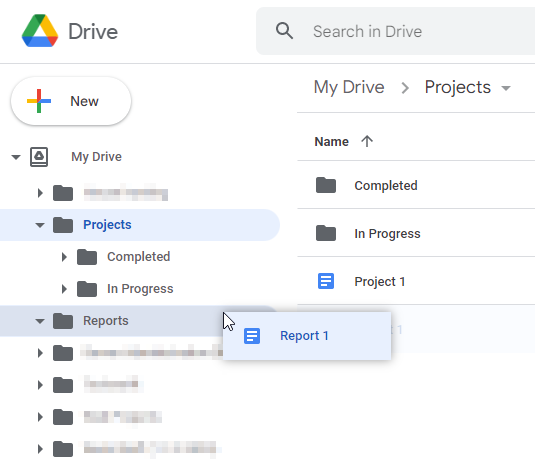
If you’re on the PC version of Google Drive, the easiest way is to drag-and-drop files into their destination folder. Just click and hold on the file you want to move, hover over the folder you want to put it in, and let go.
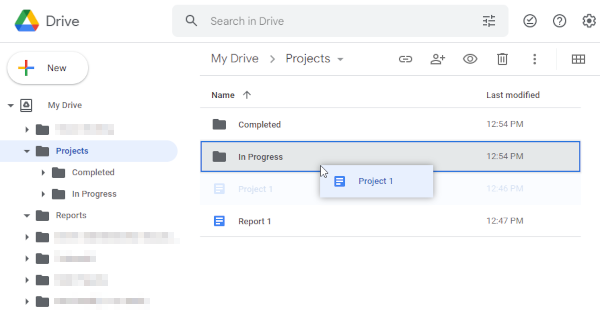
It gets a bit trickier if the destination folder isn’t on the same page as the file (e.g. in a subfolder). If this is the case, find the My Drive option and icon in the leftmost menu. Click the Triangle arrow to the left of the icon. This will display a list of available folders.
From here, expand the parent folder using its own Triangle arrow, then drag-and-drop the selected file into the destination folder.
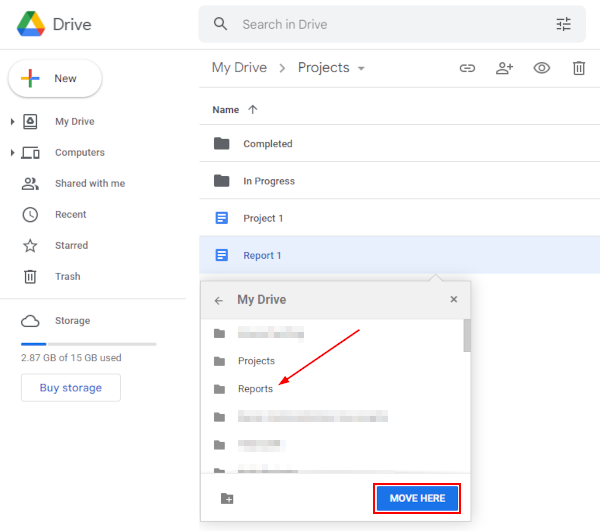
Alternatively, you can right click the file you want to move and select the Move to option. This will open a file browser dropdown menu.
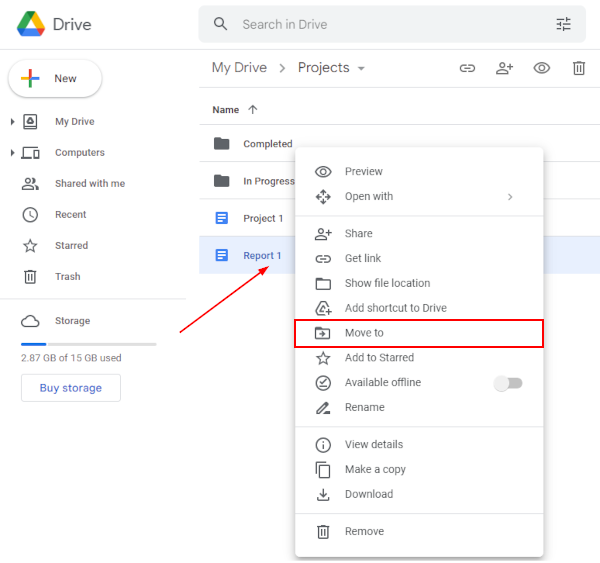
From within this window, navigate through your Google Drive directories (use the Back arrow to navigate to a parent directory). Find your destination folder, and then click Move Here in the bottom right corner.
Both of these methods will work regardless of whether you’re trying to move a single file or multiple at once. Keep in mind that you can’t drag-and-drop files from the Suggested bar at the top.
Android/iPhone
Things are a bit different on the mobile app. There’s a couple ways you can move files, depending on whether you’re trying to move one file or multiple at once.
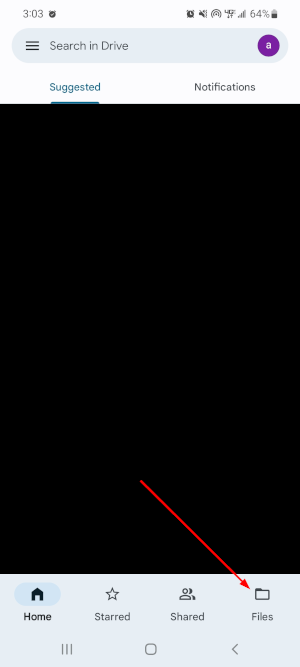
For a single file, open the Google Drive app. Make sure you’re signed into the right account. Switch to the Files tab by tapping Files at the bottom right corner of the screen, as you can’t move files from the Home screen.
Tap the 3 dots at the bottom right of the file you wish to move and select Move.

On the following screen, navigate to the desired destination folder (use the Back arrow to navigate to a parent directory), and then tap Move again, this time in the bottom right corner.
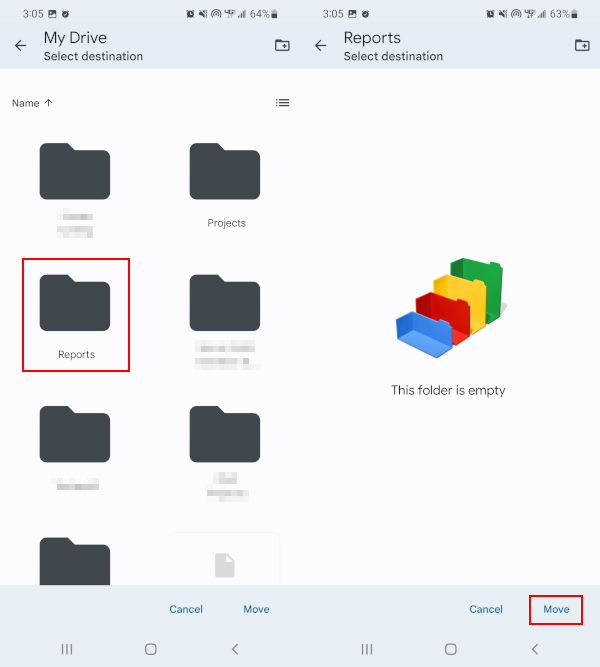
It’s slightly different if you’re trying to move multiple files at once. Instead of tapping the 3 dots at the bottom right of a file, just tap and hold on one of the files you wish to move until a checkmark appears.
Now select any number of files, and then tap the Folder/arrow icon from the top line menu. Once again, open the desired destination folder, and then tap Move in the bottom right corner.
Final Thoughts
Despite the many cloud services available today, Google Drive remains the most widely used, in large part thanks to its free 15GB storage space alongside its Google integration.
Whether you’re a student or a professional, the ability to seamlessly share files with others has changed the way the workforce functions. Keep in mind, though, that Google Drive keeps track of any and all files shared with you.
If you don’t periodically remove these shared files, you’ll end up back where you started: with a messy, cluttered Drive.


