If nobody replies to an email you’ve sent, you don’t know whether they’ve read it or not. Outlook attempts to solve this by allowing you to request a read receipt on your outgoing emails.
A read receipt is a short automatic reply that informs you when the recipient of your email opens it. It will appear in your inbox with information on who opened your email and at what time.
While read receipts are useful, they’re not perfect. When someone receives an email with a read receipt, they can opt to decline sending a reply. Additionally, some email clients don’t support read receipts or ignore them entirely.
In Outlook, you can send a read receipt for individual emails or have it automatically send one for every outgoing email. Below, we’ll show you how in Outlook 365 and Outlook for the Web (OWA).
How to Request a Read Receipt for a Single Email in the Outlook 365 Desktop Client
You can send a read receipt for a single email in the Outlook 365 desktop client by checking the Request a Read Receipt checkbox under the Options tab of a new email. Here’s how, step-by-step:
- Open the Outlook desktop client and sign into your account.
- Click
New Emailunder the Home tab in the upper left corner to compose a new email, but don’t send it yet.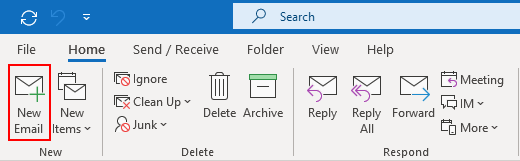
- Click the
Optionstab above the new email you’re drafting and check theRequest a Read Receiptbox.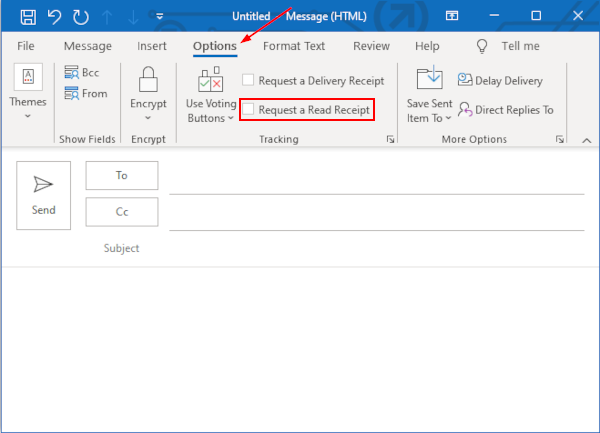
- Send the email. You’ll receive an automatic reply if the recipient chooses to send one upon reading the email.
How to Request a Read Receipt for a Single Email in Outlook for the Web (OWA)
You can send a read receipt for a single email in Outlook for the Web by checking the Request a read receipt checkbox in the Message options of a new email. Here’s how, step-by-step:
- Open Outlook for the Web and sign into your account.
- Click
New messagein the upper left corner to compose a new email, but don’t send it yet.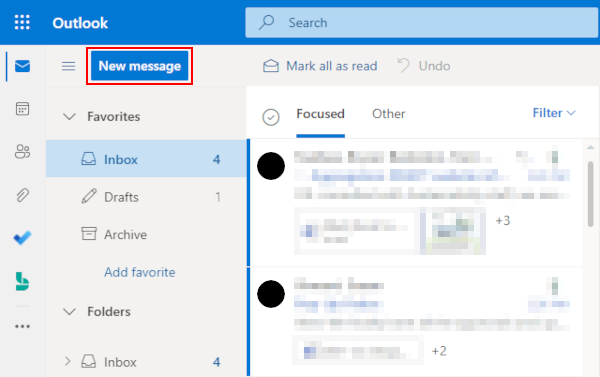
- Click the
3 dotsabove the email you’re drafting and selectShow message options...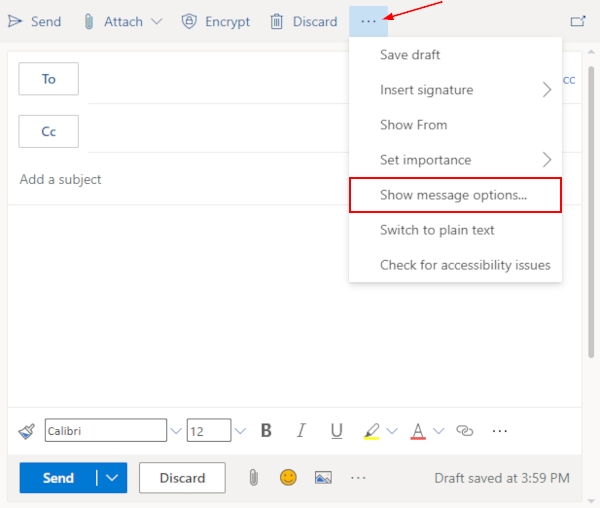
- Check the
Request a read receiptbox and then clickOK.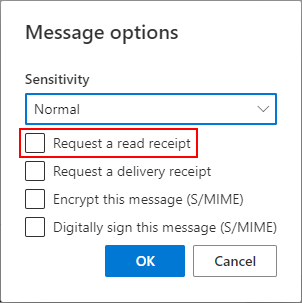
- Send the email. You’ll receive an automatic reply if the recipient chooses to send one upon reading the email.
Requesting Read Receipts for Every Email You Send in Outlook
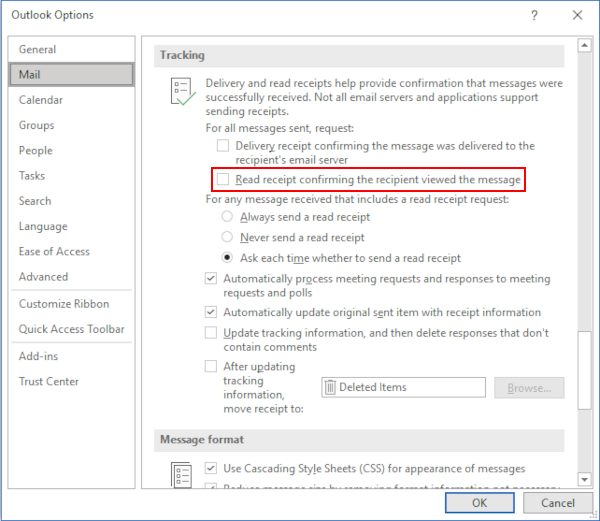
You can have Outlook automatically include a read receipt with every email you send in Outlook. You can find this setting in the Tracking section of Outlook’s mail settings.
Unfortunately, this feature is only available in the Outlook 365 desktop client. Here’s how to enable it:
- Open the Outlook desktop client and sign into your account.
- Click
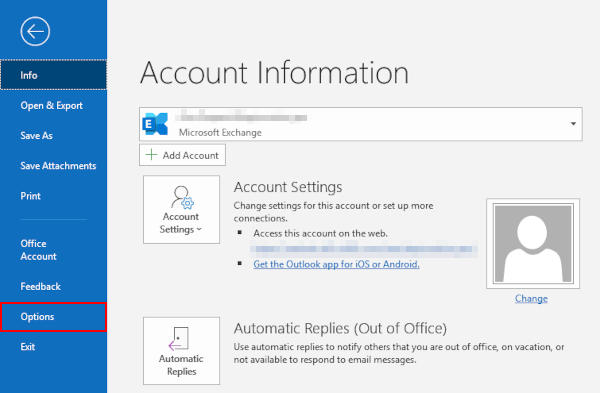
Filein the upper left corner and then selectOptionsin the menu at the left.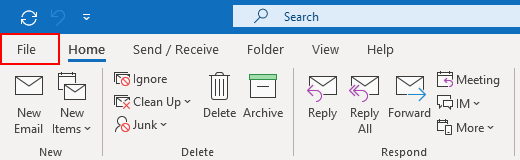
- In the Outlook Options window that appears, click
Mailin the left most menu.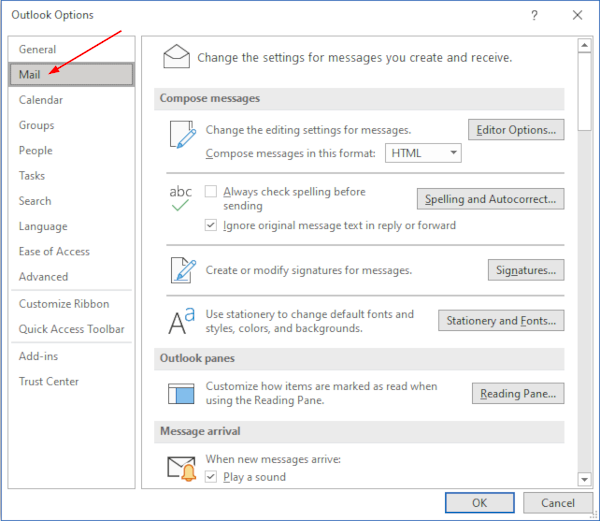
- Scroll down to the Tracking section in the right panel and check the
Read receipt confirming the recipient viewed the message.