Zoom is a video conferencing software that is full of a ton of useful features. From team chat and video conferencing to screen sharing and remote assistance, Zoom has something for everyone.
An often overlooked feature of Zoom is the ability to draw or annotate over presentations when screen sharing. Think of this as using a whiteboard for your visuals but the whiteboard is now your screen.
Oh and if you prefer a whiteboard, Zoom’s got your back because you can pull up a virtual one and use it like you would in person. In this article, we’ll show you how to draw / annotate in a Zoom meeting.
How to Draw / Annotate on your Screen in a Zoom Meeting
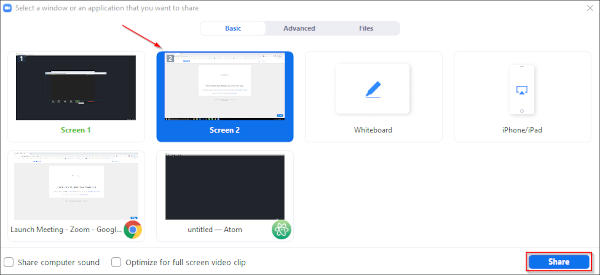
- While in a meeting, start screen sharing by clicking the
Shareicon in theMeeting controlsand selecting a screen / program.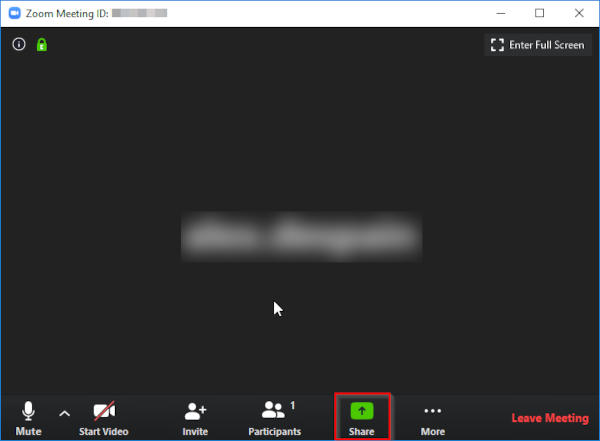
- Move your mouse to the top of your screen so that the
Meeting controlsappear and then clickAnnotate.
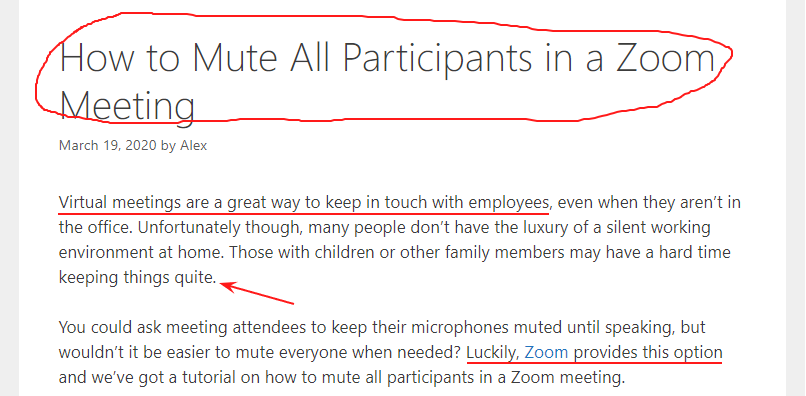
- Use the
Annotate toolbarto draw lines and shapes over your screen.
- When finished sharing your screen, click the
Stop Sharebutton at the top of your screen.
How to use the Zoom Whiteboard
- While in a meeting, click the green
Shareicon in theMeeting controls. - Select
Whiteboardand then click theSharebutton.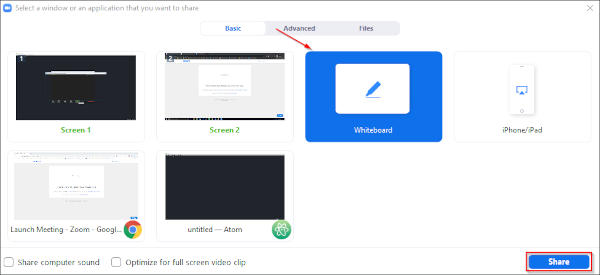
- Start drawing! Use the
Annotate toolbarto change lines, shapes, and colors. - When finished using the whiteboard, click the
Stop Sharebutton at the top of your screen.


Hi. I happily use the annotate function whilst sharing desktop screen or whiteboard. However the option to annotate is not available when I share the content of a second camera. Frustrating as this is a good way to alter students written work whilst they watch. Is there a way of doing this?
Hey Alex, just a question, during a zoom class I played around with this annotate feature not knowing what it is, just trying it out. I scribbled all around my teacher’s slide and I think everyone saw my scribbled, I basicly filled his entire screen share with red lines. As soon as I knew, I left the zoom class. Was my scribble erased as I left the session or did it stay even while I was gone? I’d hate it if it stayed cause it was such an important time and my teacher is a good professor. 😭
Hi Ken,
If you weren’t the one presenting then I don’t think you have anything to worry about. The annotations were likely only visible to you.
Okay. My Zoom account is attached to a reading program (to help kids with reading problems.) When I do an assessment on them, I open the program, open zoom, share, get the program that’s been opened, and we can test. But.. when I need to stop the test, and read the word to the student, and I don’t want the student to see the word, I would “stop share”. They would see my face only But then, I can’t see the words to read to the student. How can I keep seeing the information but not allow them to see?
Hi Shauna,
Once you stop sharing, you should be able to pull up the program on your screen without the students seeing it. It’s only when you’re sharing that they will see what’s one your screen.
Thank you this was VERY helpful. Can you use an annotation tool when presenting as a slide?
why cant i draw on my own whiteboard i checked the screen share settings but it is enable pls help me solve my problem
Hello 🙂 how do you annotate without sharing the screen on Zoom. I have an image of a chalkboard as a backdrop and would like to “type” on the chalkboard with my video image along side. TIA 🙂
Hi Nevs,
If you click the `Share` button, I believe you can select your webcam. Once you’re “presenting” you should then be able to select `Annotate` in the controls at the top.
Are the guests able to draw on the whiteboard as well?
Hi Ashley,
Yes, when sharing a screen / whiteboard click the `More` button and select `Allow/Disable participants annotation`. You can find more information on this on Zoom’s support page.
https://support.zoom.us/hc/en-us/articles/115005706806-Using-annotation-tools-on-a-shared-screen-or-whiteboard
what if share screen is disabild
you can tell your teacher to disable it
THIS ISNT HELPFUL
Sorry you found this unhelpful… can you explain what is wrong?
This was very helpful. Are the guests at the zoom meeting able to use the white board as well?
Thank you! See my response below regarding participant annotations.
yeah
um..can you update it?
Hi,
What needs to be updated?
When I am sharing screen, then others writing on my shared screen. How to disallow to write on my screen.
Hi,
Please see my reply below regarding this.
Yes, when sharing a screen / whiteboard click the `More` button and select `Allow/Disable participants annotation`. You can find more information on this on Zoom’s support page.
https://support.zoom.us/hc/en-us/articles/115005706806-Using-annotation-tools-on-a-shared-screen-or-whiteboard