Managing mailbox space in Outlook can be a time consuming process. Outlook usually automates cleanup processes through archiving but can sometimes miss certain items like old calendar entries. Unfortunately these calendar items can also have large attachments and even be difficult to find. If you’re finding yourself low on mailbox space and can’t figure out why, try following the steps below on how to delete old calendar items in Outlook.
How to Delete Old Outlook Calendar Items
Follow these steps if you wish to permanently delete these items.
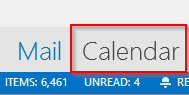
Step 1: Click the Calendar tab at the lower left hand corner
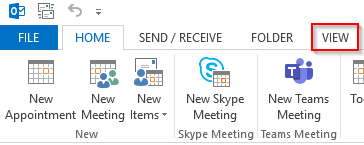
Step 2: Click the View tab at the upper left hand corner
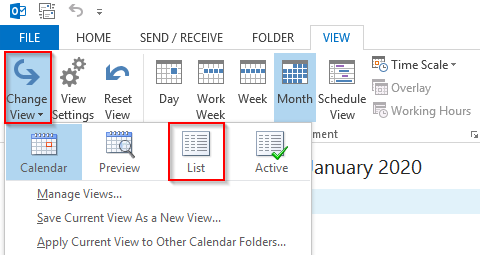
Step 3: Click the Change View button in the View tab’s ribbon and select List in the drop down menu
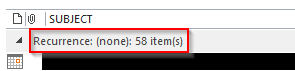
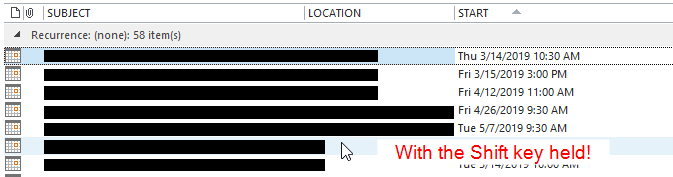
Step 4: In the new list view, click the START column to organize your calendar items by oldest first

Make sure you’re not deleting Recurring items by paying attention to the Recurrence note under SUBJECT.
Step 5: Select the first calendar item you’d like to delete then hold the Shift key on your keyboard and click the last item to delete
You can also hold down the Ctrl key to select items individually.
Step 6: Press the Delete key on your keyboard
Alternatively, you can right click and choose Delete in the drop down menu.
To change the view back to the default, simple click the Change View button again and select Calendar.
How to Archive Old Calendar Items
Follow these steps if you might access these items are a later date.
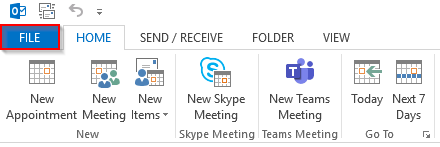
Step 1: Click the File tab at the upper left hand corner
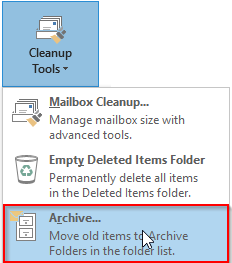
Step 2: Click the Cleanup Tools tile and select the Archive... option
Step 3: In the Archive menu, select the Calendar folder

Step 4: Use the Archive items older than drop down to set a a date range
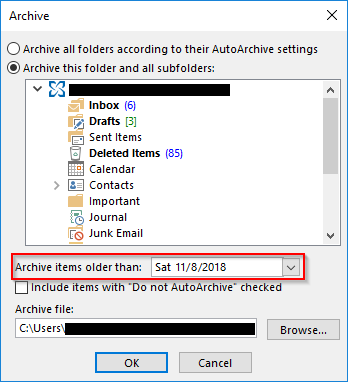
Older than 3 months is the recommended setting but if space is an issue you may want to set it higher.
Step 5: If the Archive file box is empty, use the Browse... button to specify a location for your new archive
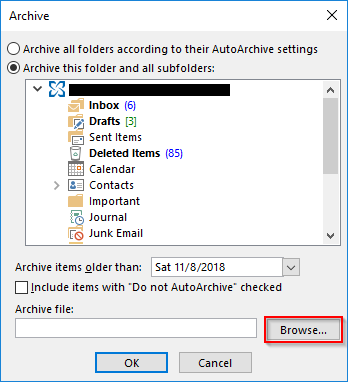
Step 6: Click Ok


