
While old by technology standards, Outlook’s user base continues to grow. In 2019, Outlook climbed its way through the ranks to become the third most popular email client, and its popularity has only increased over the years.
Outlook offers a variety of tools that both individuals and businesses find useful – on top of creating calendar events from emails and rescheduling meetings, Outlook also allows users to forward meeting invites to one another. We’ve provided a step-by-step guide on how to do so below.
It’s worth noting that when forwarding a meeting to someone, the invitation will appear to come from the meeting organizer. Additionally, the meeting organizer will receive a notification that the meeting has been forwarded.
How to Forward a Meeting Invite in Outlook 365 on PC
Once there’s a meeting on your calendar, forwarding a meeting invite is pretty straight forward. Simply select the meeting invite you wish to forward and then click Forward under the Meeting tab at the top of Outlook, or right click the meeting on your calendar and forward it from there.
- Open the Outlook desktop client and sign into your account.
- Click the
Calendaricon at the bottom left corner of your screen.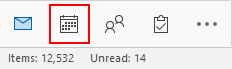
- In your calendar, right click the meeting you want to forward and select
Forward > Forward Occurrenceto forward only the selected meeting, orForward > Forward Seriesto forward this meeting and all future occurrences of it.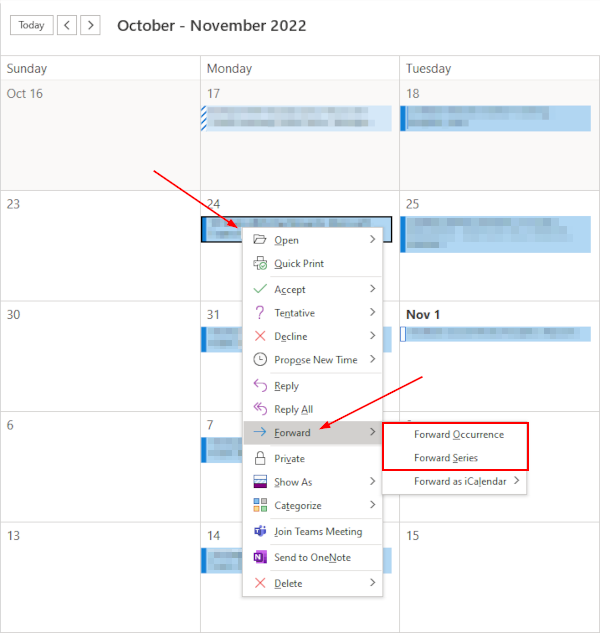
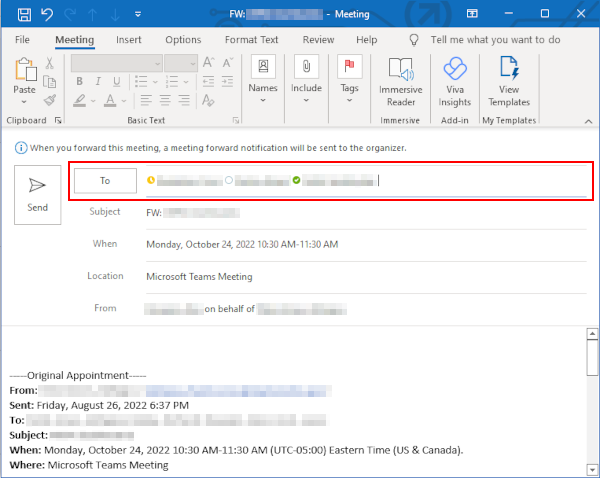
- In the window that appears, enter the email addresses of the desired recipients in the To field. You can include multiple email address to forward the event to multiple people.
- Click
Sendwhen you’re ready to forward the meeting.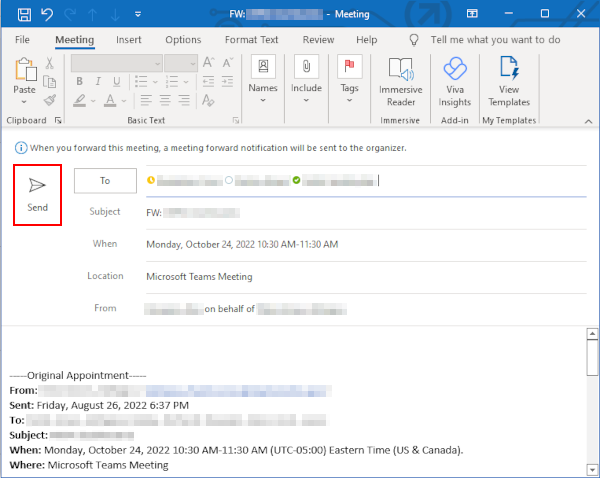
How to Forward a Meeting Invite in Outlook for the Web (OWA)
Forwarding a meeting invite in Outlook for the Web (OWA) is very similar to how it’s done on the desktop client. Simply right click the meeting invite you wish to forward, and select Forward > This event or Forward > All events in the series.
- Open Outlook for the Web and sign into your account.
- Select the
Calendaricon in the leftmost menu.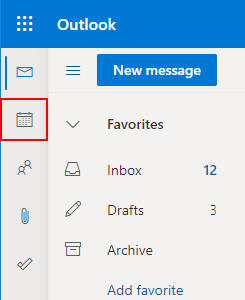
- In your calendar, right click the meeting you want to forward and select
Forward > This eventto forward only the selected meeting, orForward > All events in the seriesto forward this meeting and all future occurrences of it.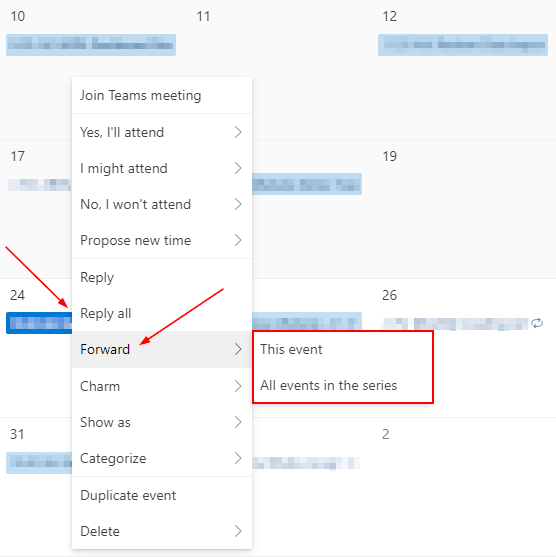
- In the window that appears, enter the email addresses of the desired recipients in the To field. You can include multiple email address to forward the event to multiple people.
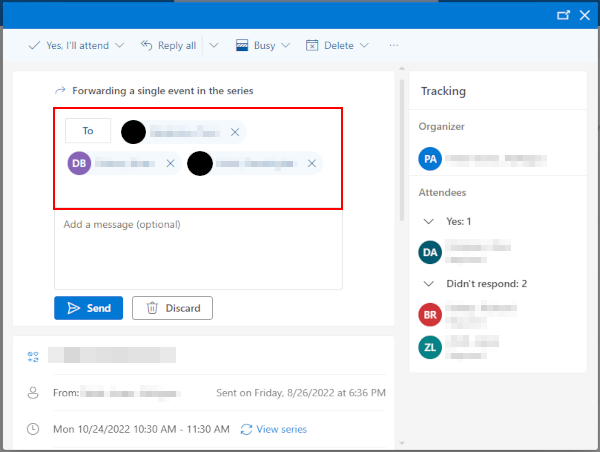
- Click
Sendwhen you’re ready to forward the meeting.
How to Forward a Meeting invite in the Outlook Mobile App
If you’re not in the office, or just don’t have access to a computer, then you’re in luck, because you can always forward a meeting invite in the Outlook mobile app. Below, we’ll take you through the steps on how on your Android or iPhone:
- Open the Outlook mobile app and sign into your account.
- Tap
Calendarat the bottom of your screen.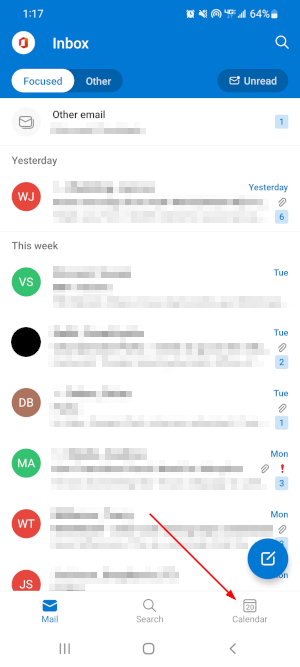
- In your calendar, tap the meeting that you wish to forward.

- Scroll down to the bottom and tap
Forward Invitation.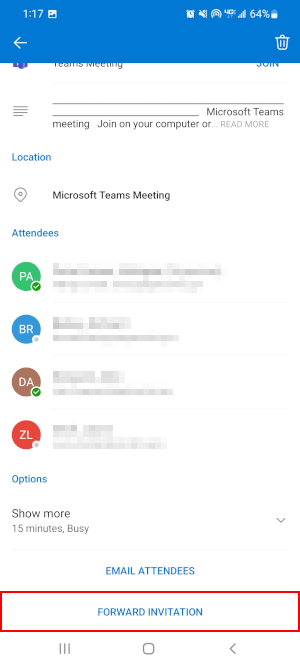
- In the window that appears, select
This event onlyif you want to forward only this meeting, orAll events in the seriesif you want to forward this and all future occurrences of it, and then tapOK.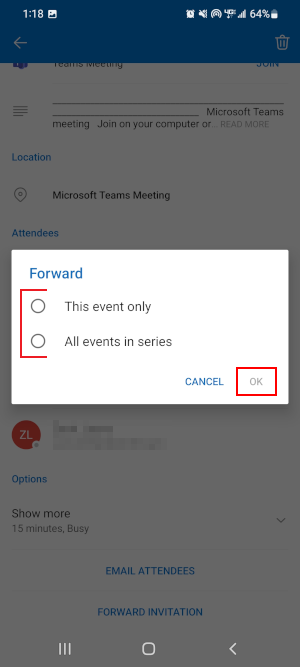
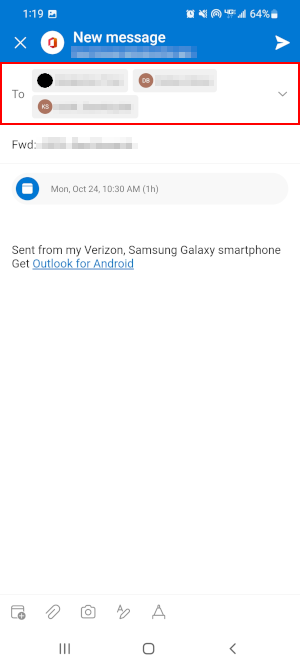
- On the following screen, enter the email addresses of the desired recipients in the To field. You can include multiple email address to forward the event to multiple people.
- Tap the
Sendicon in the upper right corner of your screen when you’re ready to forward the meeting.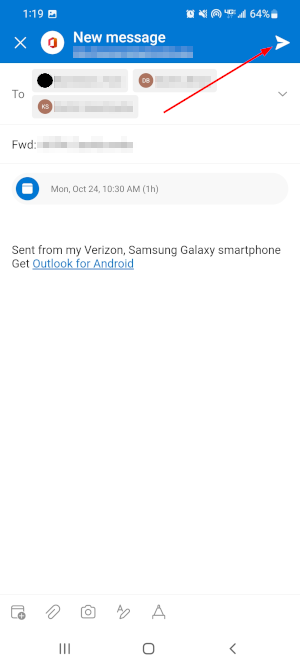
Forwarding Meetings in Outlook As the Organizer
Things are a bit different if you’re the organizer of the meeting. Instead of forwarding, you simply need to edit the attendees of the meeting.
On the desktop app, you can do this by double-clicking the meeting. This will open up a prompt, asking whether you want to update only the selected meeting, or the whole series.
After making your choice, a window will open where you can update the list of both required and optional attendees. When you’re finished, don’t forget to send the updated invitation!
Conclusion
While old, Outlook remains one of the most popular email clients in the world. It can be complicated to figure out sometimes, but thanks to the backing of Microsoft, as well as features like creating calendar events from emails, chances are that Outlook will be around for years to come.


