
Facebook’s popularity quickly made its companion chatting app, Facebook Messenger, one of the most popular chatting apps in the world. Its success can’t just be contributed to Facebook’s though, as Messenger has many of its own neat features like augmented reality effects, custom chat themes, and more.
Some of these features are sometimes better enjoyed with a group of friends. With group chats, you can do exactly that! They’re also just a great way to keep in touch with your closest friends and family.
In this article, we’ll show you how to create a group chat in Facebook Messenger on your Android, iPhone, or PC.
How to Create a Group Chat in the Facebook Messenger Mobile App
To create a group chat in the Facebook Messenger mobile app, simply tap the Pencil icon in the upper right corner of your screen and select Create a New Group Chat. Here’s how, step-by-step, on your Android or iPhone:
- Open the Facebook Messenger app.
- Tap the
Pencilicon in the upper right corner and then tapCreate New Group.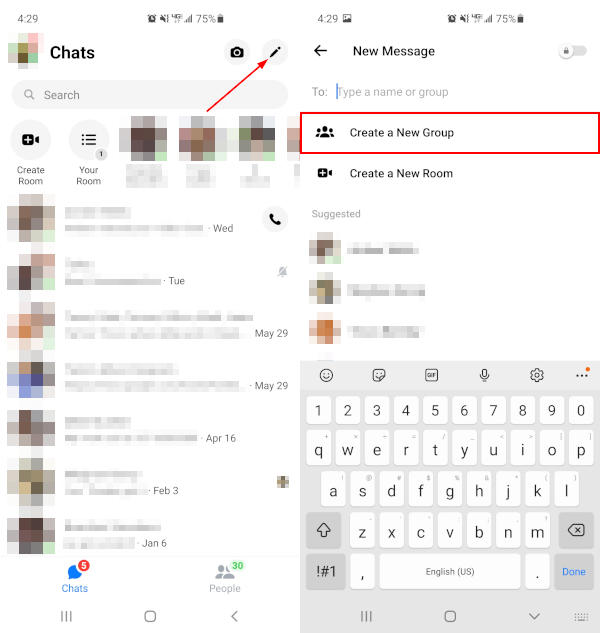
- Tap each person you wish to be a member of the group chat. A checkmark will appear to each name and their profile picture in a row at the top as you select them.
- Tap
Nextin the upper right corner.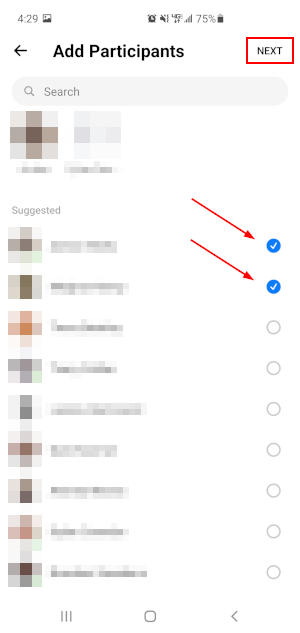
- In the New Group screen, tap the
Group Namefield and give your new group a name. - Finally, tap
Createin the upper right corner.
How to Create a Group Chat in Facebook Messenger on PC
To create a group chat in Facebook Messenger on PC, click the Pencil icon in the upper left corner of Messenger, add each person to the To: field, and finally send a message. Here’s how, step-by-step, on your PC:
- Open Facebook.com in your web browser and sign into your account.
- Click the
Messengericon in the upper right corner and then clickSee All in Messengerat the bottom. You can also simply open www.facebook.com/messages/t/ in your web browser.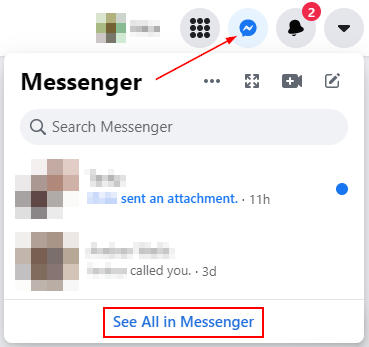
- Click the
Pencilicon in the upper left corner.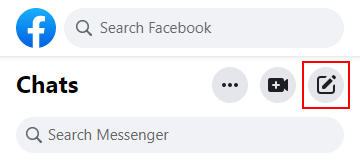
- In the
To:field, start typing the name of each person you wish to start a group chat with and select them as they appear in the list.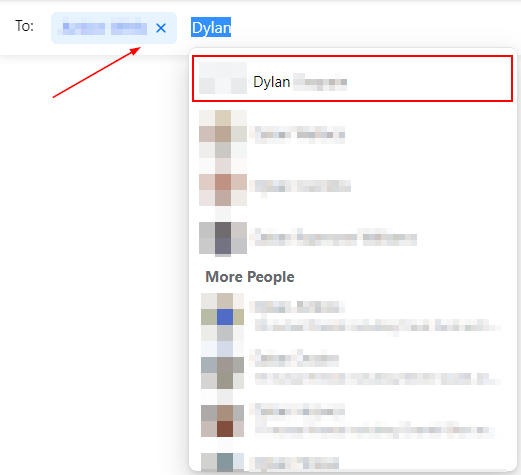
- Send a message!
If you wish to name a group on PC, click Change Chat Name in the panel at the right under Customize Chat after sending your first message.
How to Add & Remove Members of an Existing Group Chat in Facebook Messenger
After creating a group chat, it’s a good idea to know how to manage its members in case you need to add or remove someone later. Use the steps below to add/remove members from a Facebook group chat.
You’ll need to be an admin of the group to remove members, but anyone that’s already a member can add others.
Android/iPhone
- Open the Facebook Messenger app.
- Tap the group chat that you wish to add or remove a member from.
- Tap the
Informationicon in the upper right corner and then tapSee Group Members.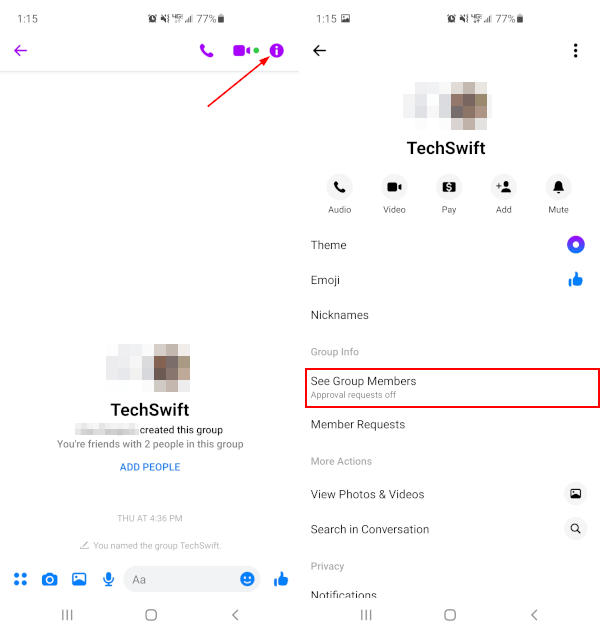
- To add a member, tap
Addin the upper right corner and select them from the list that appears. You can also tapAddnext to friends under Suggested Members.
- To remove a member, tap an existing member and then select
Remove From Group.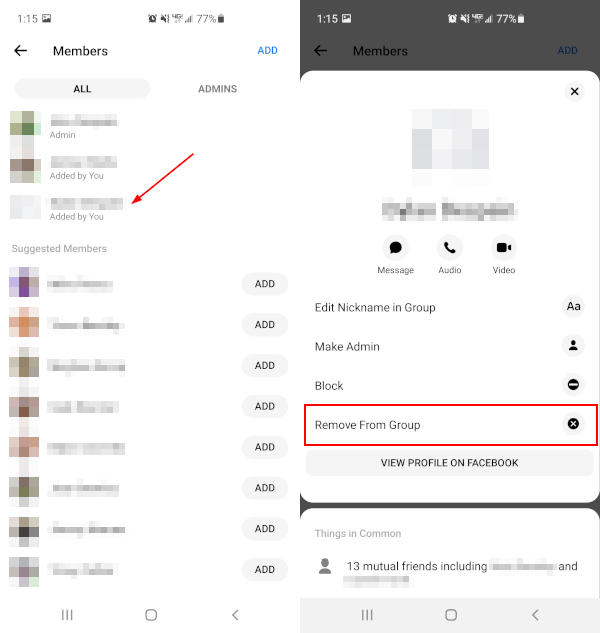
Desktop/PC
- Open Facebook Messenger in your web browser as shown in the section above. You can also simply navigate to www.facebook.com/messages/t/.
- Click the group chat you wish to add or remove a member from under Chats at the left.
- Click to expand
Chat Membersin the panel at the far right. You might, first, need to click theInformationicon in the upper right corner to reveal the panel.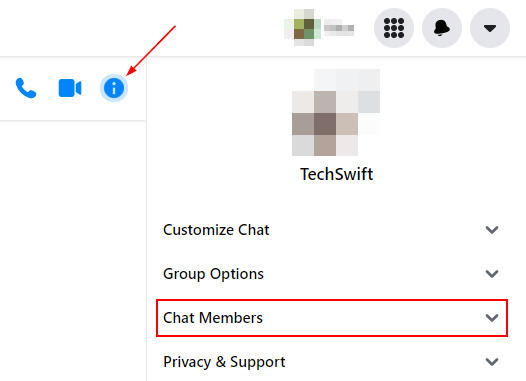
- To add a member, simply click
Add Peopleand then select them in the list that appears.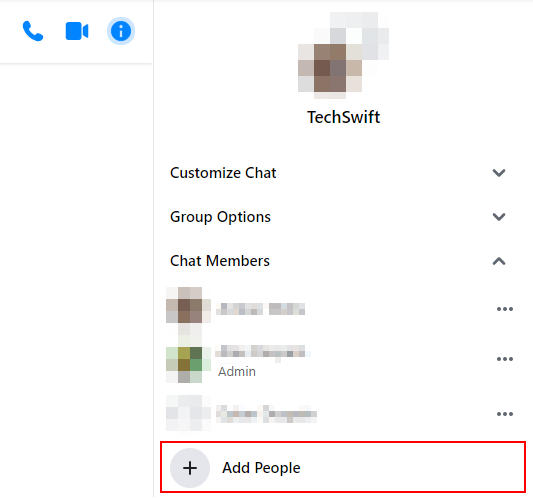
- To remove a member, click the
3 dotsnext to their name and selectRemove Member.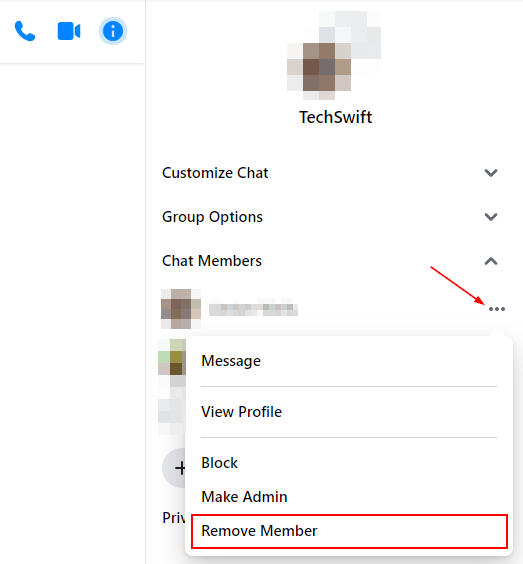
Deleting a Group Chat
Deleting a group chat in Facebook Messenger is a little more complicated than it might sound. You can delete the chat like you would any other, but that only deletes your copy of the conversation.
While you can’t delete a conversation from everyone’s inbox, you can disband the group. This will archive the conversation for everyone else in the group, and they will no longer be able to reply.
You’ll need to be an admin of a group to disband it. To do so, follow these steps:
- Open Facebook Messenger and click/tap the group you wish to disband.
- Use the steps above to remove all members of the group except yourself.
- When you are the only remaining member, select yourself and click/tap
Leave Conversation(Leave Chaton Desktop). - Click/tap the
Leavebutton on the confirmation pop-up.


This is wrong. The “create a group” is not there when you click the pencil icon. Edit or delete this post, it’s confusing
Hi Delfin,
Are you using an iPhone or Android device? I just double checked to make sure and the create a group option is there for me when tapping the pencil icon. I am using Android.