Microsoft Print to PDF is a handy feature in Windows 10 that makes printing documents to a PDF extremely easy. On some systems though, you might that Microsoft Print to PDF is missing when you go to use it.
That’s because it’s an optional feature in Windows 10 that’s usually on by default, but may need to be enabled and installed on some systems. In this article, we’ll take a look at how to enable and install Microsoft Print to PDF in Windows 10 for systems where it’s missing.
How to Enable Microsoft Print to PDF Optional Feature
Before you can install Microsoft Print to PDF, and its driver, you first need to enable it in Windows 10’s optional features.
- Hit
Windows key + Ron your keyboard to open the WindowsRundialog box. - Type in
optionalfeaturesand clickOK, or hitEnteron your keyboard. Alternatively, you can go to Windows Settings > Apps > Optional features > More Windows features (at the bottom).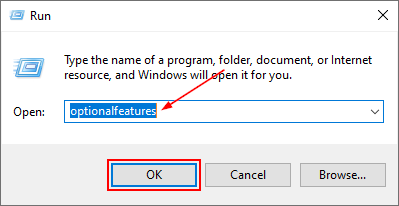
- in the
Windows Featureswindow that appears, locateMicrosoft Print to PDFand check the box to the left of it then clickOK.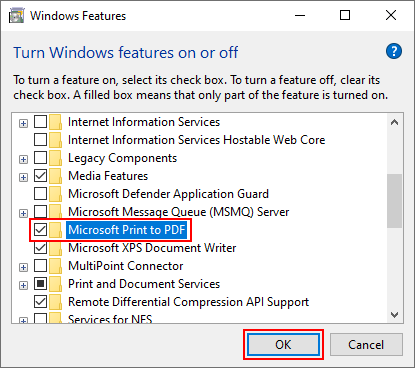
Now you are ready to install Microsoft Print to PDF!
How to Install Microsoft Print to PDF / Driver in Windows 10
- Click the
Startbutton and then click theGearicon in the bottom left of theStart menu.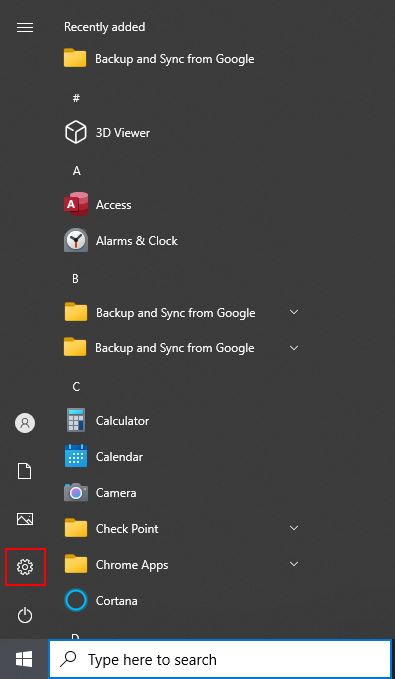
- In the
Settingswindow that appears, clickDevices.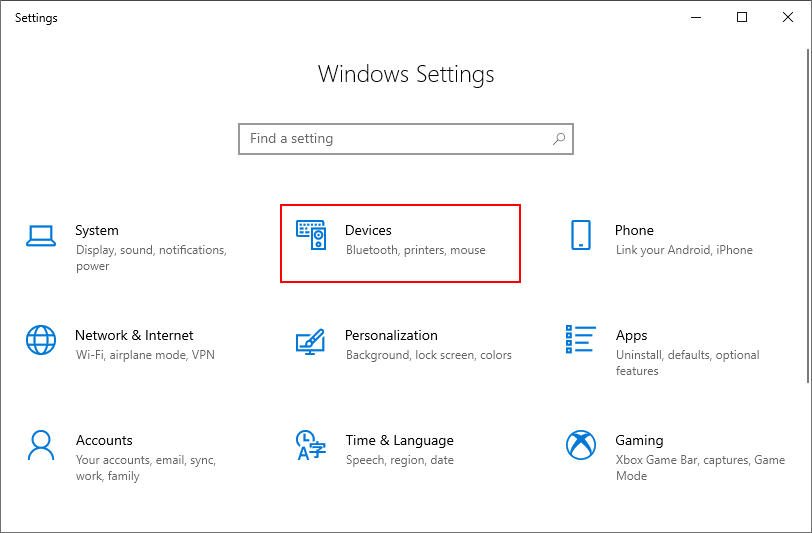
- Click
Printers & ScannersunderDevicesin the menu on the left.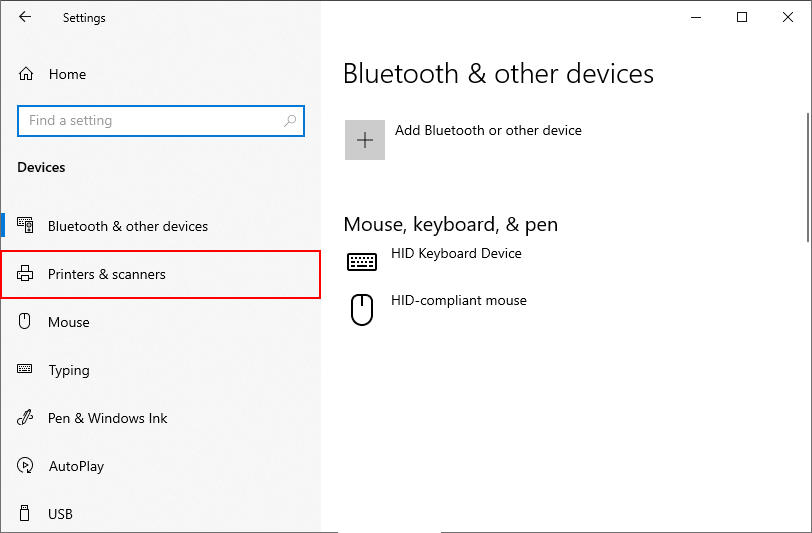
- Click
Add a printer or scannerand then clickThe printer that I want isn't listedwhen it appears (this can take a few seconds).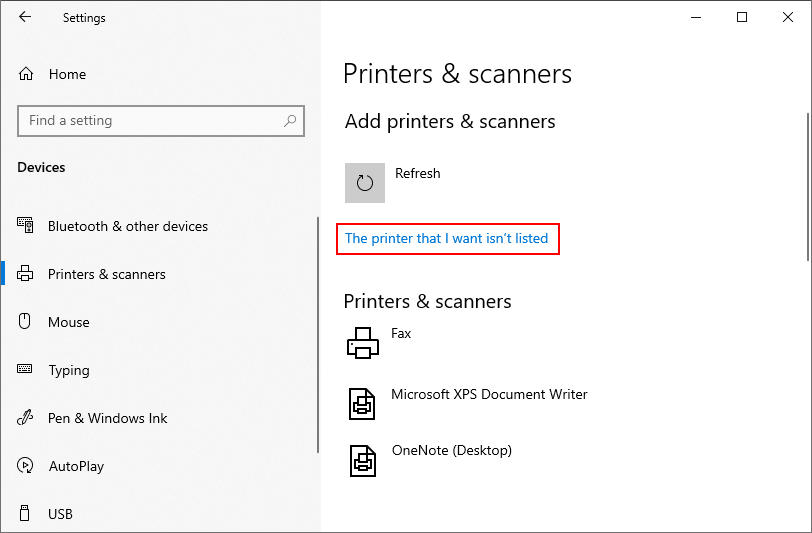
- In the
Add Printerwindow that appears, selectAdd a local printer...with manual settingsand clickNext.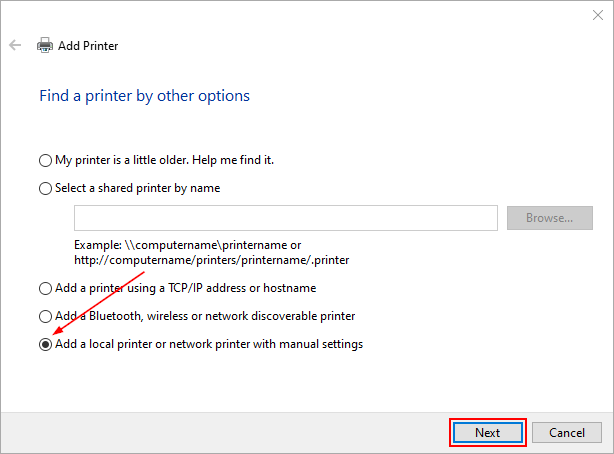
- On the next screen, select
FILE: (Print to File)from theUse an existing portdropdown menu, and then clickNext.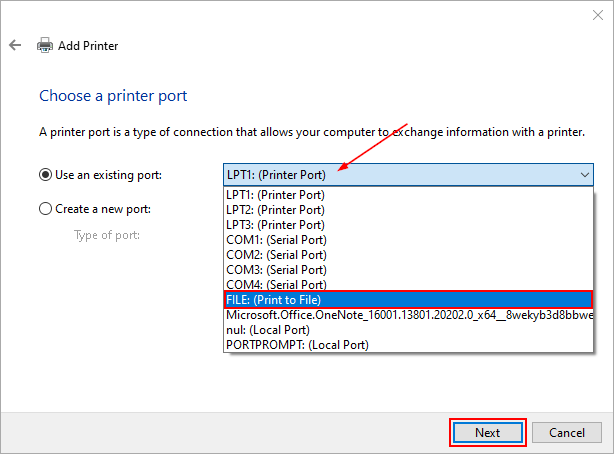
- In the following screen, select
Microsoftfrom the list on the left and thenMicrosoft Print to PDFin the list on the right. ClickNextafterwards.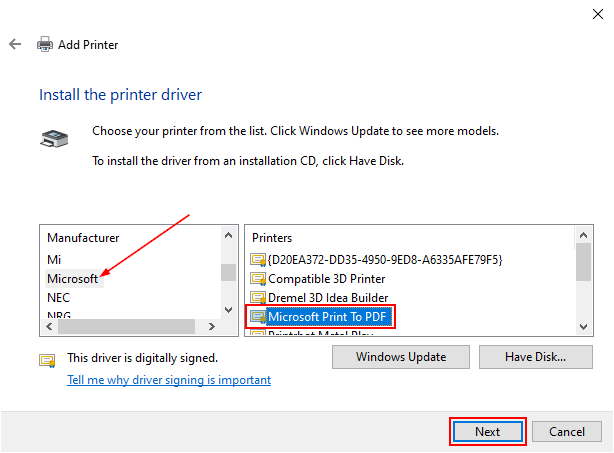
Note: If theMicrosoft Print to PDFis missing from the list on the right, click theWindows Updatebutton, then look for it again.
In some cases, the driver will still be missing from the list even after clicking theWindows Updatebutton. To fix this issue, you’ll need to remove the old driver from the system first and then try the above again. Here’s how to remove the Microsoft Print to PDF driver from your system:
- Open the Windows
Rundialog box (Windows key + R), type inprintui.exe /s, and hitOK. - In the
Print Server Propertieswindow, click theDriverstab. - Locate the
Microsoft Print to PDFdriver underInstalled printer driversand remove it. When asked whether to remove only the driver, or the driver and its packages, remove only the driver. ClickYeson any other confirmation boxes.
- Open the Windows
- Type a name for the printer, or leave it as the default
Microsoft Print to PDF(recommended), and clickNext.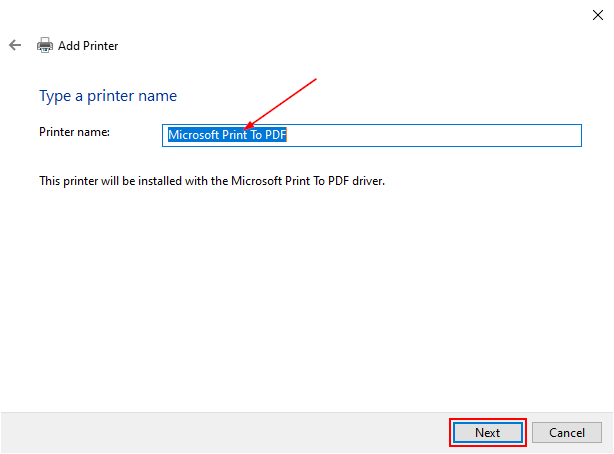
- Finally, click
Finishin the Add Printer success window. You may also want to test the printer and make sure it’s working!



Finally an article that helped me out!
Step 7 was the problem solver 🙂
Thanks!
Glad we could help!
This is not accurate:
On the next screen, select FILE: (Print to File) from the Use an existing port dropdown menu, and then click Next.
It should be set to PORTPROMPT
The driver isn’t listed among the available Microsoft drivers, and it isn’t listed as installed using printui.exe /s so it can’t be removed.
What then? Where can I find this driver?
Hello,
Have you made sure that you enabled it under the optional Windows features first?