Whether you’re going on vacation or just taking a few days off, it’s a good idea to let coworkers know that you’re out of the office. You don’t want others scheduling meetings with you when you’re unavailable.
Thankfully, it’s easy to set an out office (AKA automatic replies) in Outlook. In this article, we’ll show you how to setup automatic replies in Outlook for Windows, Outlook for the web, and in the Outlook mobile app.
How to Set an Out of Office in the Outlook 365 Desktop Client
- Open the Outlook desktop client and sign into your account.
- Click the
Filetab in the upper left corner and then selectAutomatic Replies (Out of Office).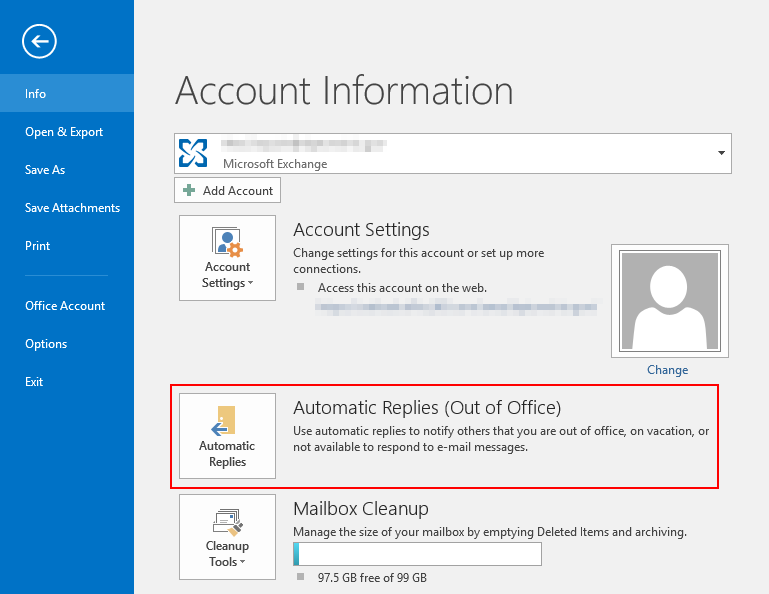
- Click the
Send Automatic repliesradio option. - If you want to send automatic replies only during a specific time frame, check the
Only send during this time rangecheckbox and fill out the date / time fields below it. - Type the message you want senders to receive in the text box under the
Inside My Organizationtab. If you want external senders to also receive automatic replies, click theOutside My Organizationtab and check theAuto-reply to people...checkbox. - Click
OKwhen finished. Your out of office is now set!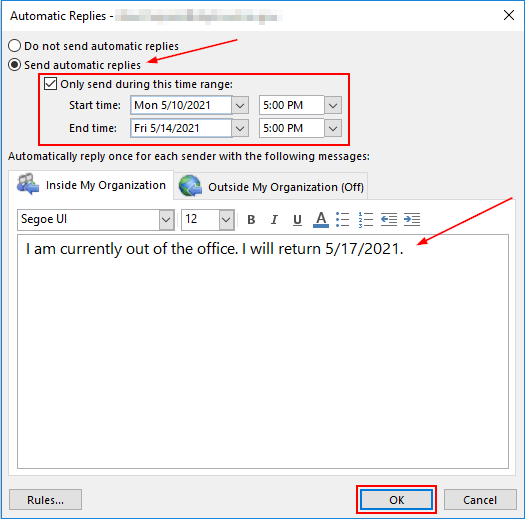
How to Set an Out of Office in Outlook for the Web (OWA)
- Open Outlook for the Web and sign into your account.
- Click the
Gearicon at the top right of Outlook and then clickView all Outlook settingsat the bottom of the menu that appears.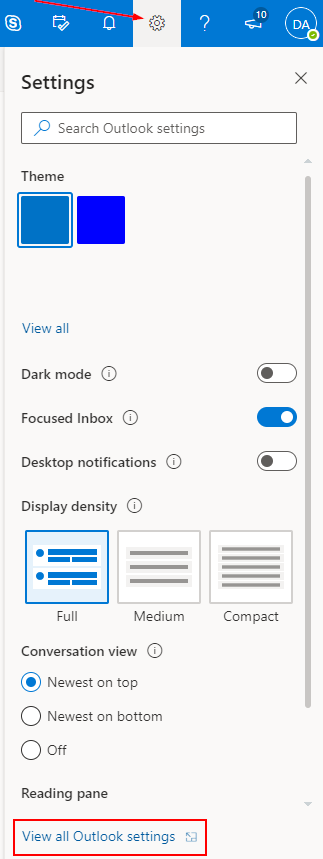
- In the Settings Window, and with Mail selected in the left-most menu, click
Automatic replies.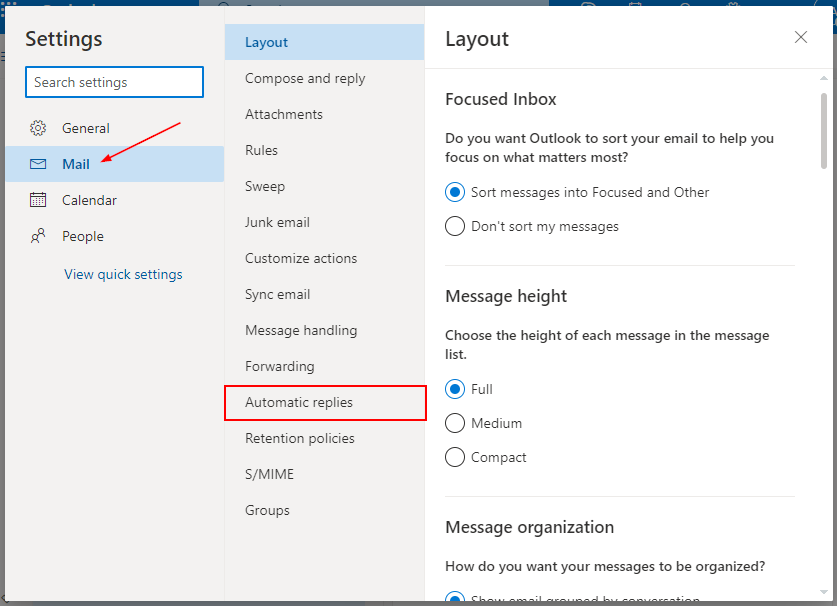
- Click the
Toggleicon next toTurn on automatic repliesto enable them.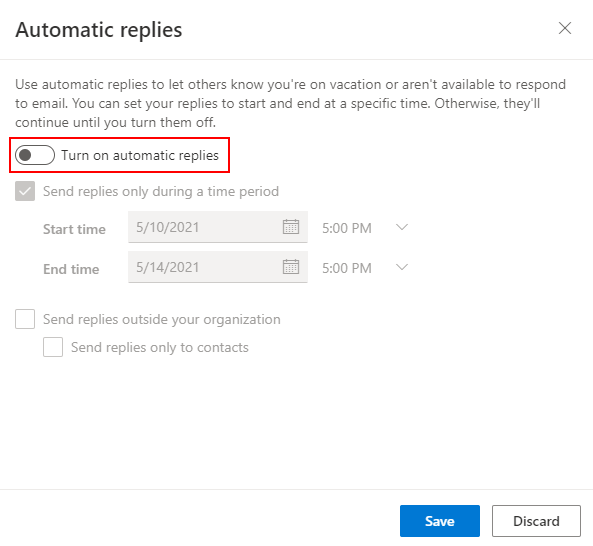
- If you only want automatic replies to be sent during a specific time frame, click the
Send replies only during a time periodcheckbox and fill out the date / time fields underneath it. You might also want to check the other boxes below this to further customize your out of office.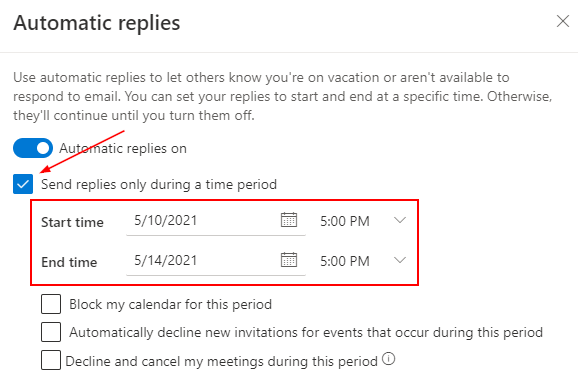
- Type a message you want senders to receive in the textbox under
Send automatic replies inside your organization. - You may want to check the
Send replies outside your organizationbox if you frequently contact external vendors / customers. - Finally, click the
Savebutton. Your out of office is now setup!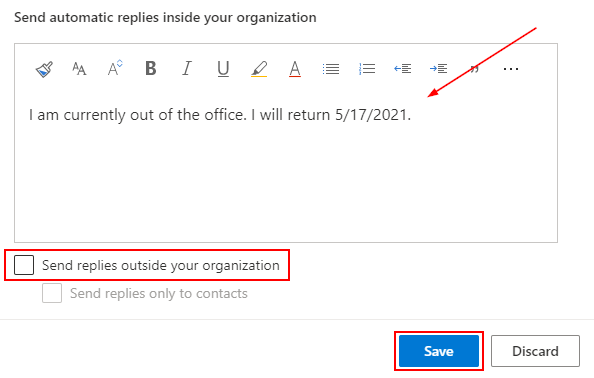
Setting an Out of Office in the Outlook Mobile App
- Open the Outlook mobile app and sign into your account.
- Tap the
Office 365icon in the upper right corner and then tap theGearicon at the bottom left of the menu that appears.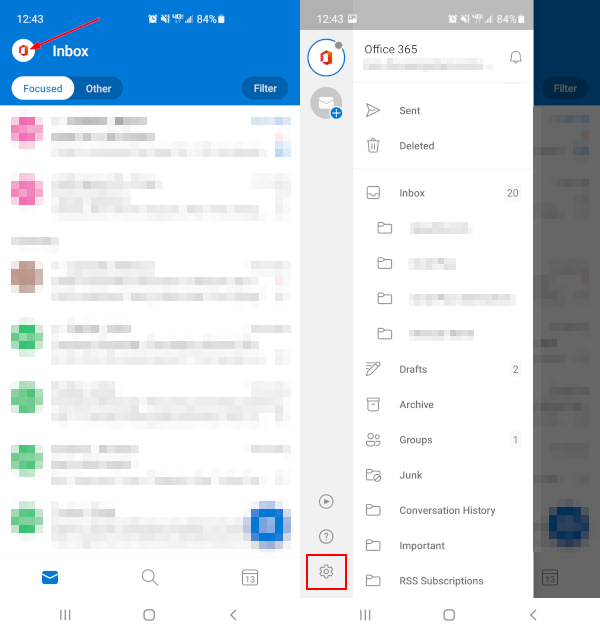
- In Settings, tap the account you wish to set automatic replies for under
Mail accountsand then tapAutomatic replieson the following screen.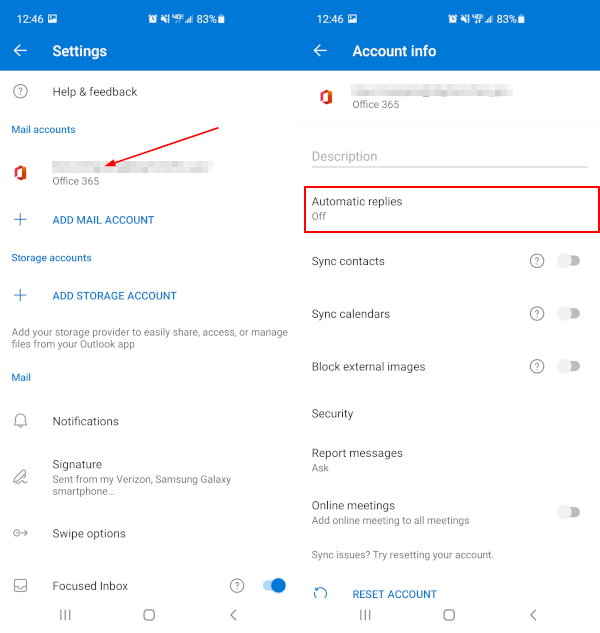
- Tap the
Toggleicon to enable automatic replies.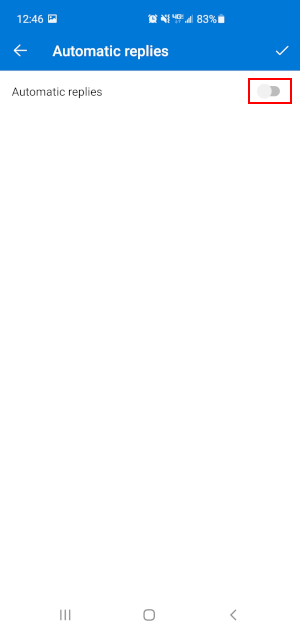
- Select either
Reply to everyoneorReply only to my organizationand the type the message you want senders to receive in the field below. - Tap the
Checkmarkicon at the upper right corner when finished. Senders will now start receiving your out of office message!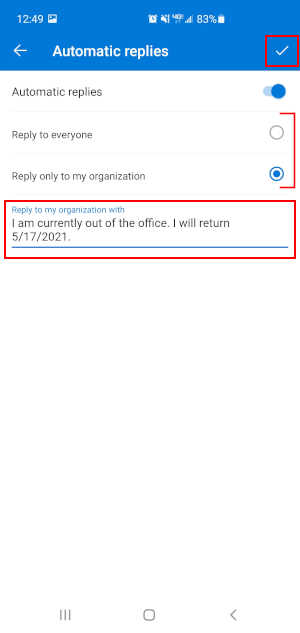
Final Thoughts
Setting an out of office in Outlook is one of the best ways to let others know when you’re traveling or will be away from the office for a while. Thankfully, you setting one is easy and you can even do it from your phone in case your forget.
If you’re traveling somewhere far away, don’t forget to adjust your time zone in Outlook if you’ll be working at all.


