While looking through your old Facebook photos, you might find a few that you’d prefer to hide from your profile. Maybe those photos from your best friend’s wedding reception 5 years ago aren’t so funny now.
With Facebook’s 350 million daily photo uploads, you’re likely not alone in regretting making some of your photos publicly visible. You could delete them, but those are your memories even if they are slightly embarrassing!
Thankfully, Facebook allows you to change the privacy settings of past posts and photos so that only you can see them – here’s how!
How to Hide Individual Photos on Facebook
Android/iPhone
- Open the Facebook mobile app and sign into your account.
- Navigate to your profile and tap
Photosunder the status bar.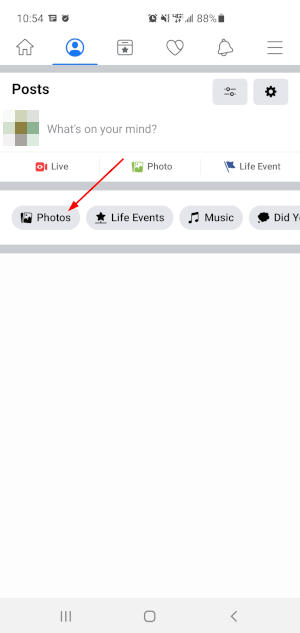
- Tap the
UploadsorAlbumstab and then tap the photo you wish to hide. We’ll cover how to hide “Photos of You” in another section below.
- Tap the
3 dotsin the upper right corner of the photo and selectEdit post privacy.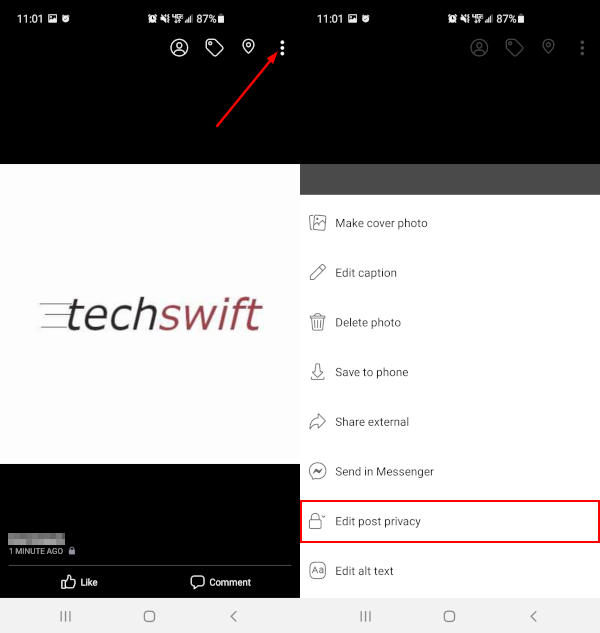
- Change the photo privacy to
Only me. You may need to tapSee moreto reveal this option.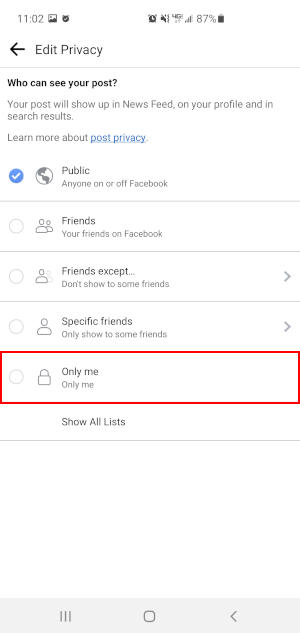
- Tap the
Backarrow in the upper left corner to save your settings.
Desktop/PC
- Open Facebook.com in your web browser and sign into your account.
- Navigate to your profile and click
Photosunder your name / bio.
- Click the
Your PhotosorAlbumstab and then click the photo you wish to hide. We’ll cover how to hide “Photos of You” in another section below.
- Click the
3 dotsin the far right corner of, or below (on smaller displays), the photo and selectEdit post audience.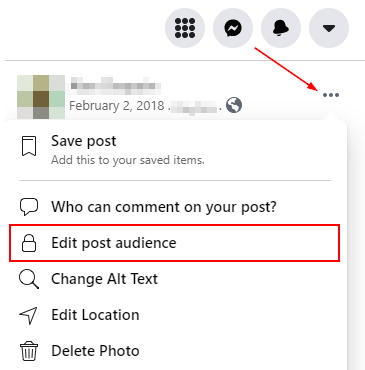
- Select
Only mein the Select Audience window that appears.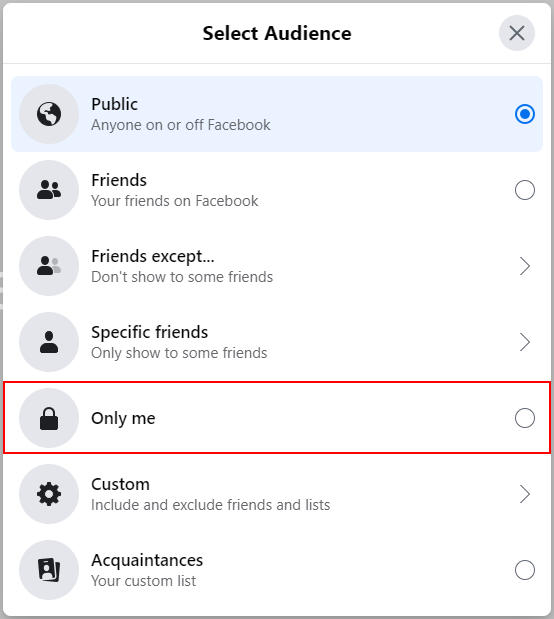
How to Hide Entire Albums on Facebook
Android/iPhone
- Open the Facebook mobile app and sign into your account.
- Navigate to your profile and tap
Photosunder the status bar. - Tap the
Albumstab and then tap the album you wish to hide.
Note: You cannot hide the Profile Pictures, Cover Photos, Videos, Mobile Uploads, or Timeline Photos albums. You can hide each individual photo in the album though using the same steps above.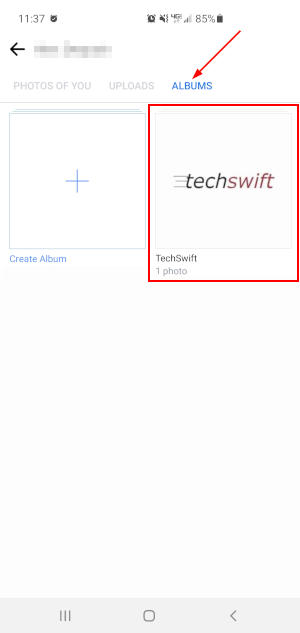
- Tap the
3 dotsin the upper right corner and selectEdit.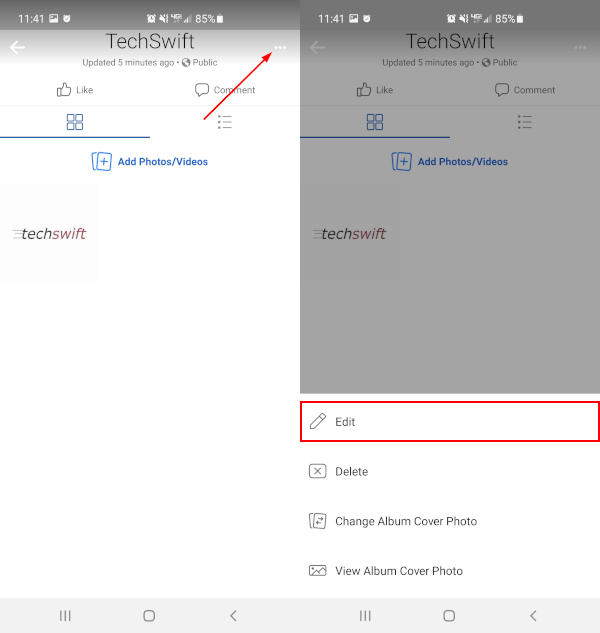
- Tap the
Audienceselector field (it should currently show as Public) and change it toOnly me. You may need to tapSee moreto reveal this option.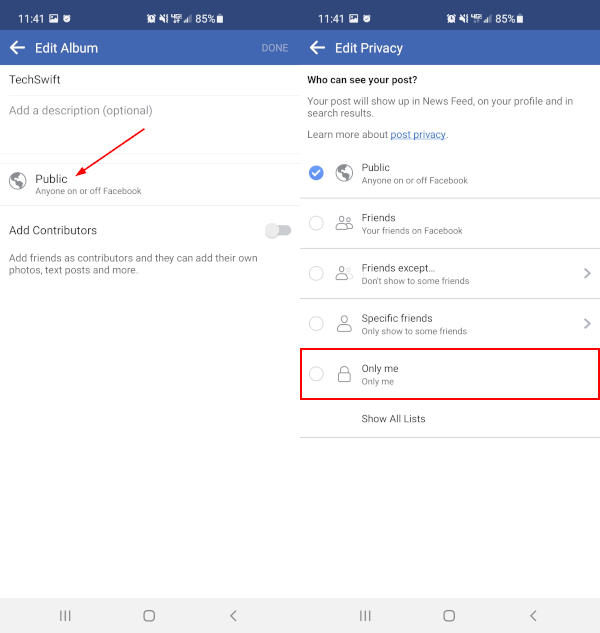
- Tap the
Backarrow and then tapDonein the upper right corner of the following screen to save your changes.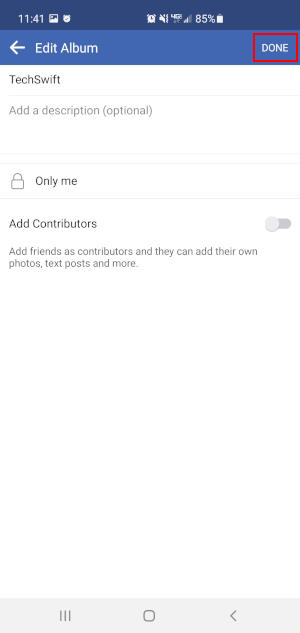
Desktop/PC
- Open Facebook.com in your web browser and sign into your account.
- Navigate to your profile and click
Photosunder your name / bio. - Click the
Albumstab and locate the album you wish to hide. - Click the
3 dotsin the upper right corner of the album and selectEdit Album.
Note: You cannot hide the Profile Pictures, Cover Photos, Videos, Mobile Uploads, or Timeline Photos albums. You can hide each individual photo in the album though using the same steps above.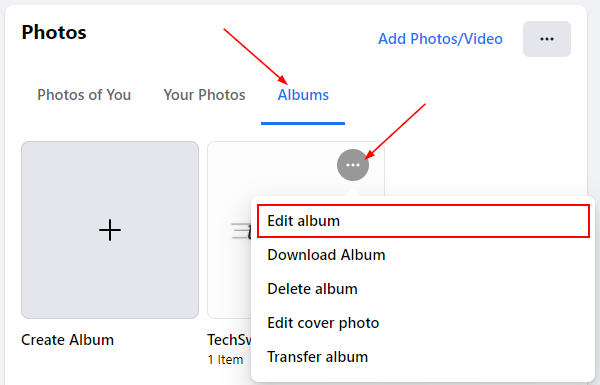
- Click the
Audience buttonunder Edit Album in the panel at the far left.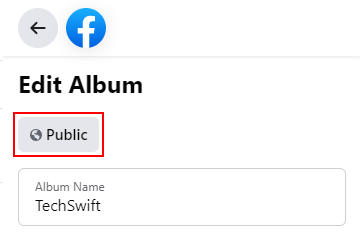
- Select
Only mein the Select Audience window that appears. - Finally, save your changes using the
Savebutton at the bottom of the left panel.
How to Hide “Photos of You” on Facebook
Android/iPhone
- Open the Facebook mobile app and sign into your account.
- Tap the
3 barsin the upper right corner and selectSettings & Privacy>Settingsnear the bottom.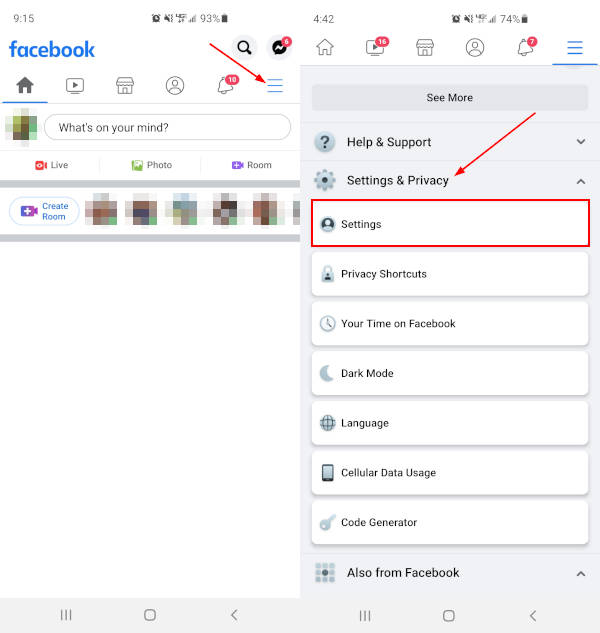
- Tap
Profile and Taggingunder the Privacy section.
- Under Tagging, tap
Who can see posts you're tagged in on your profile?and change it toOnly Me. You may need to tapSee moreto reveal this option.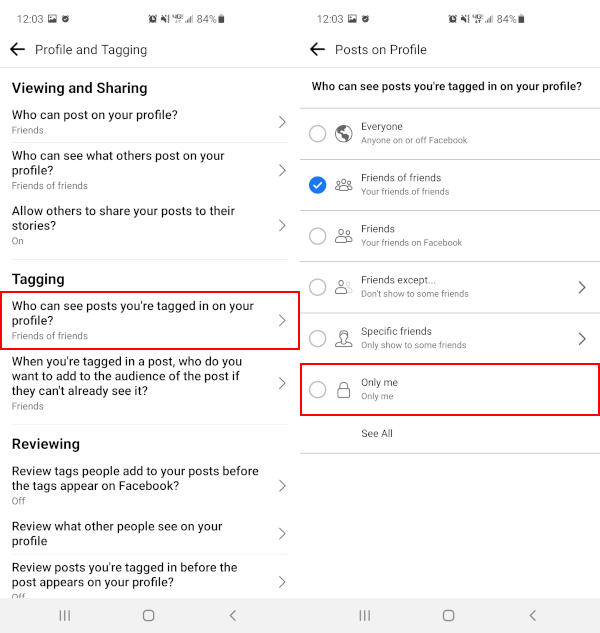
- Tap the
Backbutton to save your changes. - Do the same for the
When you're tagged in a post, who do you want...option. This will make sure that future posts you’re tagged in will not show up on your profile.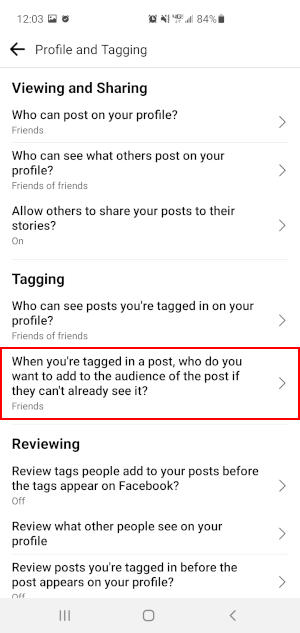
Desktop/PC
- Open Facebook.com in your web browser and sign into your account.
- Click the
Down arrowin the upper right corner of Facebook and selectSettings & Privacy>Settings.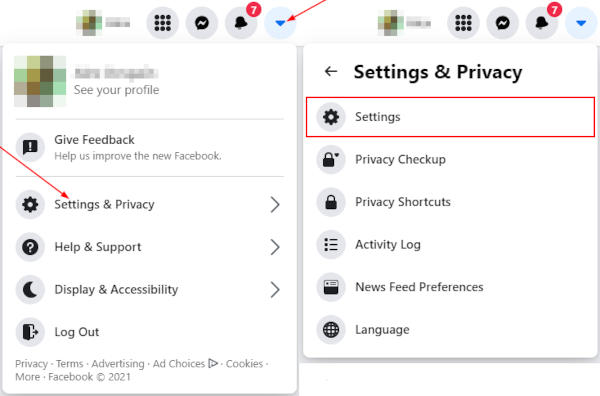
- In the menu at the far left, click
Profile and Tagging.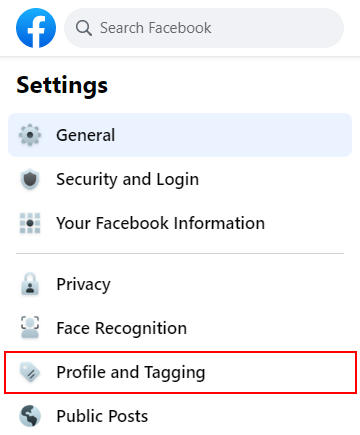
- Click
Who can see posts you're tagged in on your profile?to the right of Tagging and change it toOnly me.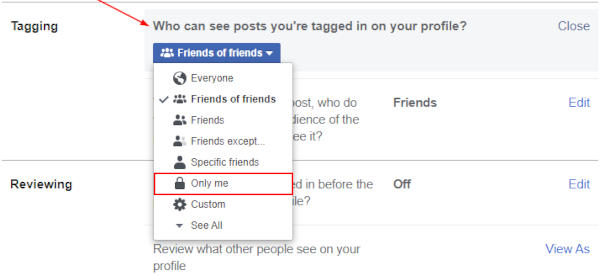
- Do the same for the
When you're tagged in a post, who do you want...option. This will make sure that future posts you’re tagged in will not show up on your profile.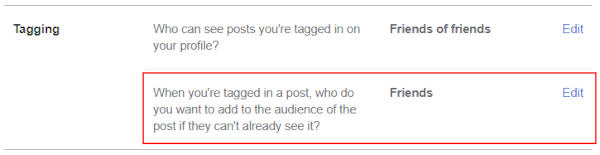
Final Thoughts
For many people, Facebook has slowly become a digital photo album where some of their favorite memories are stored. Now that you know how to hide your old photos, why not check out how to add new photos to Facebook without posting them?


